0x00 参考 本笔记直接参考或引自如下链接文章:
https://www.w3cschool.cn/wkspring/
http://c.biancheng.net/spring/
0x01 Spring AOP AOP的全称是“Aspect Oriented Programming”,即面向切面编程,它将业务逻辑的各个部分进行隔离,使开发人员在编写业务逻辑时可以专心于核心业务,从而提高了开发效率。
AOP采取横向抽取机制,取代了传统纵向继承体系的重复性代码,其应用主要体现在事务处理、日志管理、权限控制、异常处理等方面。
目前最流行的AOP框架有两个:
0x02 AOP术语 AOP相关术语如下:
名称
说明
Joinpoint(连接点)
指那些被拦截到的点,在Spring中,可以被动态代理拦截目标类的方法。
Pointcut(切入点)
指要对哪些Joinpoint进行拦截,即被拦截的连接点。
Advice(通知)
指拦截到Joinpoint之后要做的事情,即对切入点增强的内容。
Target(目标)
指代理的目标对象。
Weaving(植入)
指把增强代码应用到目标上,生成代理对象的过程。
Proxy(代理)
指生成的代理对象。
Aspect(切面)
切入点和通知的结合。
0x03 JDK动态代理 在Java中java.lang.reflect包下提供了一个Proxy类和一个InvocationHandler接口,通过使用这个类和接口就可以生成动态代理对象。在程序运行过程中产生的这个对象,其实就是通过反射机制来生成的一个代理。
注意,JDK提供的代理只能针对接口做代理 。
具体更多的可参考之前的文章:Java动态代理机制
Demo 除了前面的参考文章中的例子外,再看个模拟使用JDK动态代理实现AOP的例子。
CustomerDao.java,接口类:
1
2
3
4
5
6
7
8
package com.mi1k7ea;public interface CustomerDao public void add () public void update () public void delete () public void find () }
CustomerDaoImpl.java,实现CustomerDao接口类:
1
2
3
4
5
6
7
8
9
10
11
12
13
14
15
16
17
18
19
20
package com.mi1k7ea;public class CustomerDaoImpl implements CustomerDao @Override public void add () System.out.println("CustomerDaoImpl.add()" ); } @Override public void update () System.out.println("CustomerDaoImpl.update()" ); } @Override public void delete () System.out.println("CustomerDaoImpl.delete()" ); } @Override public void find () System.out.println("CustomerDaoImpl.find()" ); } }
MyAspect.java,切面类,定义了两个增强的方法,分别为myBefore()和myAfter()方法,用于对目标类CustomerDaoImpl进行增强:
1
2
3
4
5
6
7
8
9
10
11
package com.mi1k7ea;public class MyAspect public void myBefore () System.out.println("方法执行之前" ); } public void myAfter () System.out.println("方法执行之后" ); } }
MyBeanFactory.java,代理类,使用java.lang.reflect.Proxy实现JDK动态代理,定义了一个静态的getBean()方法,这里模拟Spring框架的IoC思想,通过调用getBean()方法创建CustomerDao实例,其中Proxy.newProxyInstance()方法的第一个参数是当前类的类加载器,第二参数是所创建实例的实现类的接口,第三个参数就是需要增强的方法;在目标类方法执行的前后,分别执行切面类中的myBefore()方法和myAfter()方法:
1
2
3
4
5
6
7
8
9
10
11
12
13
14
15
16
17
18
19
20
21
22
23
24
25
26
package com.mi1k7ea;import java.lang.reflect.InvocationHandler;import java.lang.reflect.Method;import java.lang.reflect.Proxy;public class MyBeanFactory public static CustomerDao getBean () final CustomerDao customerDao = new CustomerDaoImpl(); final MyAspect myAspect = new MyAspect(); return (CustomerDao) Proxy.newProxyInstance( MyBeanFactory.class.getClassLoader(), new Class[] { CustomerDao.class }, new InvocationHandler() { public Object invoke (Object proxy, Method method, Object[] args) throws Throwable myAspect.myBefore(); Object obj = method.invoke(customerDao, args); myAspect.myAfter(); return obj; } }); } }
MainApp.java,在调用代理类的getBean()方法时,获取的是CustomerDao类的代理对象,然后调用了该对象中的方法:
1
2
3
4
5
6
7
8
9
10
11
12
13
package com.mi1k7ea;public class MainApp public static void main (String[] args) CustomerDao customerDao = MyBeanFactory.getBean(); customerDao.add(); customerDao.update(); customerDao.delete(); customerDao.find(); } }
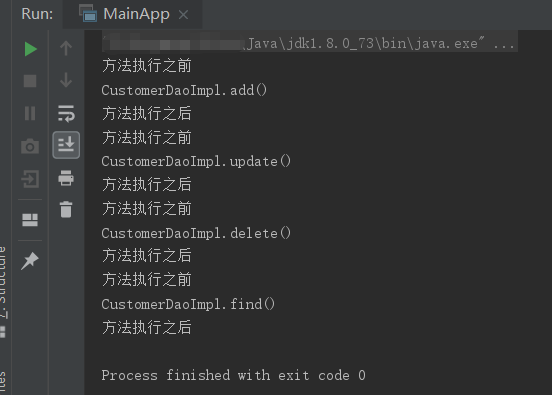
输出如下,说明成功通过JDK动态代理实现AOP:
0x04 CGLIB动态代理 JDK动态代理使用起来非常简单,但是存在一定的局限性,即只能对接口进行代理、不能对普通的类进行代理,如果不希望实现接口,则可以使用CGLIB代理。
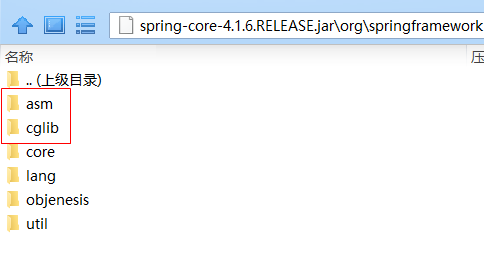
CGLIB(Code Generation Library)是一个高性能开源的代码生成包,它被许多AOP框架所使用,其底层是通过使用一个小而快的字节码处理框架ASM(Java字节码操控框架)转换字节码并生成新的类。因此CGLIB要依赖于ASM的包,解压Spring的核心包spring-core的jar包,其中包含asm和cglib目录,也就是说Spring的核心包已经集成了CGLIB所需要的包,所以在开发中不需要另外导入ASM的JAR包了:
网上找的两者的区别如下:
Java动态代理是利用反射机制生成一个实现代理接口的匿名类,在调用具体方法前调用InvokeHandler来处理。
而cglib动态代理是利用asm开源包,对代理对象类的class文件加载进来,通过修改其字节码生成子类来处理。
1、如果目标对象实现了接口,默认情况下会采用JDK的动态代理实现AOP
3、如果目标对象没有实现了接口,必须采用CGLIB库,spring会自动在JDK动态代理和CGLIB之间转换
如何强制使用CGLIB实现AOP?
JDK动态代理和CGLIB字节码生成的区别?
Demo GoodsDao.java,被代理的非接口类:
1
2
3
4
5
6
7
8
9
10
11
12
13
14
15
16
package com.mi1k7ea;public class GoodsDao public void add () System.out.println("添加商品..." ); } public void update () System.out.println("修改商品..." ); } public void delete () System.out.println("删除商品..." ); } public void find () System.out.println("修改商品..." ); } }
MyBeanFactory.java,CGLIB代理类,应用了CGLIB的核心类Enhancer,调用了Enhancer.setSuperclass()方法确定被代理的类GoodsDao;然后调用setCallback()方法添加回调函数,其中intercept()方法相当于JDK动态代理方式中创建的invoke()方法,该方法会在目标方法执行的前后,对切面类中的方法进行增强;最后调用Enhancer.create()方法创建代理类并返回:
1
2
3
4
5
6
7
8
9
10
11
12
13
14
15
16
17
18
19
20
21
22
23
24
25
26
27
28
29
30
31
32
33
34
35
package com.mi1k7ea;import org.springframework.cglib.proxy.Enhancer;import org.springframework.cglib.proxy.MethodInterceptor;import org.springframework.cglib.proxy.MethodProxy;import java.lang.reflect.Method;public class MyBeanFactory public static GoodsDao getBean () final GoodsDao goodsDao = new GoodsDao(); final MyAspect myAspect = new MyAspect(); Enhancer enhancer = new Enhancer(); enhancer.setSuperclass(goodsDao.getClass()); enhancer.setCallback(new MethodInterceptor() { @Override public Object intercept (Object proxy, Method method, Object[] args, MethodProxy methodProxy) throws Throwable myAspect.myBefore(); Object obj = method.invoke(goodsDao, args); myAspect.myAfter(); return obj; } }); GoodsDao goodsDaoProxy = (GoodsDao) enhancer.create(); return goodsDaoProxy; } }
MainApp.java,调用CGLIB代理类的getBean()方法,实际获取的是GoodsDao的代理对象并调用其方法:
1
2
3
4
5
6
7
8
9
10
11
12
13
package com.mi1k7ea;public class MainApp public static void main (String[] args) GoodsDao goodsDao = MyBeanFactory.getBean(); goodsDao.add(); goodsDao.update(); goodsDao.delete(); goodsDao.find(); } }
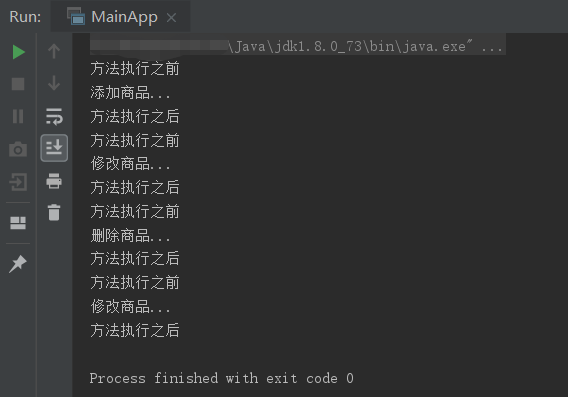
运行输出:
0x05 Spring通知类型 通知(Advice)其实就是对目标切入点进行增强的内容,Spring AOP为通知(Advice)提供了org.aopalliance.aop.Advice接口。
Spring通知按照在目标类方法的连接点位置,可以分为以下五种类型:
名称
说明
org.springframework.aop.MethodBeforeAdvice(前置通知)
在方法之前自动执行的通知称为前置通知,可以应用于权限管理等功能。
org.springframework.aop.AfterReturningAdvice(后置通知)
在方法之后自动执行的通知称为后置通知,可以应用于关闭流、上传文件、删除临时文件等功能。
org.aopalliance.intercept.MethodInterceptor(环绕通知)
在方法前后自动执行的通知称为环绕通知,可以应用于日志、事务管理等功能。
org.springframework.aop.ThrowsAdvice(异常通知)
在方法抛出异常时自动执行的通知称为异常通知,可以应用于处理异常记录日志等功能。
org.springframework.aop.IntroductionInterceptor(引介通知)
在目标类中添加一些新的方法和属性,可以应用于修改旧版本程序(增强类)。
0x06 创建AOP代理 Spring创建一个AOP代理的基本方法是使用org.springframework.aop.framework.ProxyFactoryBean,这个类对应的切入点和通知提供了完整的控制能力,并可以生成指定的内容。
ProxyFactoryBean类中的常用可配置属性如下:
属性名称
描 述
target
代理的目标对象
proxyInterfaces
代理要实现的接口,如果有多个接口,则可以使用以下格式赋值: <list> <value ></value> ... </list>
proxyTargetClass
是否对类代理而不是接口,设置为 true 时,使用 CGLIB 代理
interceptorNames
需要植入目标的 Advice
singleton
返回的代理是否为单例,默认为 true(返回单实例)
optimize
当设置为 true 时,强制使用 CGLIB
Demo 在Spring通知中,环绕通知是一个非常典型的应用。下面通过环绕通知的案例演示Spring创建AOP代理的过程。
除了SpringFramework的jar包外,还需要com.springsource.org.aopalliance-1.0.0.jar。
CustomerDao.java和CustomerDaoImpl.java不变。
MyAspect.java,实现了MethodInterceptor接口,并实现了接口的invoke()方法;MethodInterceptor接口是Spring AOP的JAR包提供的,而invoke()方法用于确定目标方法mi,并告诉Spring要在目标方法前后执行哪些方法:
1
2
3
4
5
6
7
8
9
10
11
12
13
14
15
package com.mi1k7ea;import org.aopalliance.intercept.MethodInterceptor;import org.aopalliance.intercept.MethodInvocation;public class MyAspect implements MethodInterceptor public Object invoke (MethodInvocation mi) throws Throwable System.out.println("方法执行之前" ); Object obj = mi.proceed(); System.out.println("方法执行之后" ); return obj; } }
MainApp.java:
1
2
3
4
5
6
7
8
9
10
11
12
13
14
15
package com.mi1k7ea;import org.springframework.context.ApplicationContext;import org.springframework.context.support.ClassPathXmlApplicationContext;public class MainApp public static void main (String[] args) ApplicationContext applicationContext = new ClassPathXmlApplicationContext("Beans.xml" ); CustomerDao customerDao = (CustomerDao) applicationContext.getBean("customerDaoProxy" ); customerDao.add(); customerDao.update(); customerDao.delete(); customerDao.find(); } }
Beans.xml,首先配置目标类和通知,然后使用ProxyFactoryBean类生成代理对象;其中配置代理实现的接口、代理的目标对象以及需要植入目标的通知;最后设置value属性值为true时,表示使用CGLIB代理,属性值为false时,表示使用JDK动态代理:
1
2
3
4
5
6
7
8
9
10
11
12
13
14
15
16
17
18
19
20
21
22
23
24
25
<?xml version="1.0" encoding="UTF-8"?> <beans xmlns ="http://www.springframework.org/schema/beans" xmlns:xsi ="http://www.w3.org/2001/XMLSchema-instance" xsi:schemaLocation ="http://www.springframework.org/schema/beans http://www.springframework.org/schema/beans/spring-beans-3.0.xsd" > <bean id ="customerDao" class ="com.mi1k7ea.CustomerDaoImpl" /> <bean id ="myAspect" class ="com.mi1k7ea.MyAspect" /> <bean id ="customerDaoProxy" class ="org.springframework.aop.framework.ProxyFactoryBean" > <property name ="proxyInterfaces" value ="com.mi1k7ea.CustomerDao" /> <property name ="target" ref ="customerDao" /> <property name ="interceptorNames" value ="myAspect" /> <property name ="proxyTargetClass" value ="true" /> </bean > </beans >
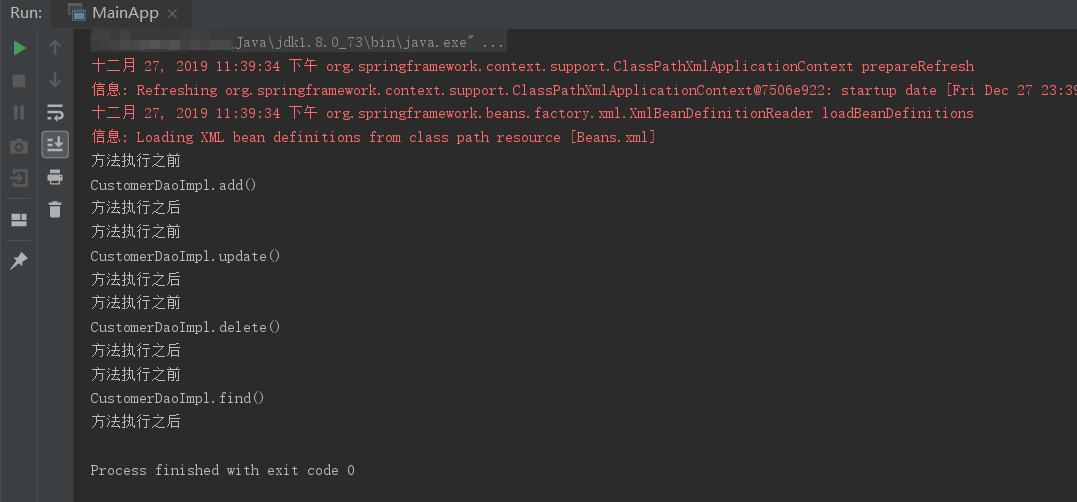
运行输出:
0x07 使用AspectJ开发AOP AspectJ是一个基于Java语言的AOP框架,它扩展了Java语言。Spring 2.0以后,新增了对AspectJ方式的支持,新版本的Spring框架,建议使用AspectJ方式开发AOP。
使用AspectJ开发AOP通常有两种方式:
基于XML的声明式
基于Annotation的声明式
基于XML的声明式 基于XML的声明式是指通过Spring配置文件的方式定义切面、切入点及声明通知,而所有的切面和通知都必须定义在<aop:config>元素中。
通过XML架构来实现的AOP,为了能使用aop命名空间标签,你需要导入spring-aop j架构,如下:
1
2
3
4
5
6
7
8
9
10
11
12
<?xml version="1.0" encoding="UTF-8"?> <beans xmlns ="http://www.springframework.org/schema/beans" xmlns:xsi ="http://www.w3.org/2001/XMLSchema-instance" xmlns:aop ="http://www.springframework.org/schema/aop" xsi:schemaLocation ="http://www.springframework.org/schema/beans http://www.springframework.org/schema/beans/spring-beans-3.0.xsd http://www.springframework.org/schema/aop http://www.springframework.org/schema/aop/spring-aop-3.0.xsd " > </beans >
此外,还需要在ClassPath中使用以下AspectJ库文件:aspectjrt.jar、aspectjweaver.jar、aspectj.jar、aopalliance.jar。
声明aspect 一个aspect 是使用aop元素声明的,支持的bean是使用ref 属性引用的,如下所示:
1 2 3 4 5 6 7 8 <aop:config > <aop:aspect id ="myAspect" ref ="aBean" > ... </aop:aspect > </aop:config > <bean id ="aBean" class ="..." > ... </bean >
这里,“aBean” 将被配置和依赖注入,就像前面的章节中你看到的其他的Spring Bean一样。
声明切入点 一个切入点 有助于确定使用不同建议执行的感兴趣的连接点(即方法)。在处理基于配置的XML架构时,切入点将会按照如下所示定义:
1 2 3 4 5 6 7 8 9 10 <aop:config > <aop:aspect id ="myAspect" ref ="aBean" > <aop:pointcut id ="businessService" expression ="execution(* com.xyz.myapp.service.*.*(..))" /> ... </aop:aspect > </aop:config > <bean id ="aBean" class ="..." > ... </bean >
下面的示例定义了一个名为“businessService”的切入点,该切入点将与com.mi1k7ea包下的Student类中的getName()方法相匹配:
1 2 3 4 5 6 7 8 9 10 <aop:config > <aop:aspect id ="myAspect" ref ="aBean" > <aop:pointcut id ="businessService" expression ="execution(* com.mi1k7ea.Student.getName(..))" /> ... </aop:aspect > </aop:config > <bean id ="aBean" class ="..." > ... </bean >
声明建议 你可以使用<aop:{ADVICE NAME}>元素在一个aspect中声明五个建议中的任何一个,如下所示:
1 2 3 4 5 6 7 8 9 10 11 12 13 14 15 16 17 18 19 20 21 22 23 24 25 26 27 28 29 <aop:config > <aop:aspect id ="myAspect" ref ="aBean" > <aop:pointcut id ="businessService" expression ="execution(* com.xyz.myapp.service.*.*(..))" /> <aop:before pointcut-ref ="businessService" method ="doRequiredTask" /> <aop:after pointcut-ref ="businessService" method ="doRequiredTask" /> <aop:after-returning pointcut-ref ="businessService" returning ="retVal" method ="doRequiredTask" /> <aop:after-throwing pointcut-ref ="businessService" throwing ="ex" method ="doRequiredTask" /> <aop:around pointcut-ref ="businessService" method ="doRequiredTask" /> ... </aop:aspect > </aop:config > <bean id ="aBean" class ="..." > ... </bean >
你可以对不同的建议使用相同的doRequiredTask 或者不同的方法。这些方法将会作为aspect模块的一部分来定义。
Demo 除了当前环境已有的jar包外,还需要添加com.springsource.org.aspectj.weaver-1.6.8.RELEASE.jar。
Student.java,拥有name和age属性及其getter和setter方法,同时还定义了一个打印并抛出错误信息的函数:
1
2
3
4
5
6
7
8
9
10
11
12
13
14
15
16
17
18
19
20
21
22
23
24
package com.mi1k7ea;public class Student private Integer age; private String name; public void setAge (Integer age) this .age = age; } public Integer getAge () System.out.println("Age : " + age ); return age; } public void setName (String name) this .name = name; } public String getName () System.out.println("Name : " + name ); return name; } public void printThrowException () System.out.println("Exception raised" ); throw new IllegalArgumentException(); } }
Logging.java,实际上是aspect模块的一个示例,定义了在各个点调用的方法:
1
2
3
4
5
6
7
8
9
10
11
12
13
14
15
16
17
18
19
20
21
22
23
24
25
26
27
28
29
30
31
32
package com.mi1k7ea;public class Logging public void beforeAdvice () System.out.println("Going to setup student profile." ); } public void afterAdvice () System.out.println("Student profile has been setup." ); } public void afterReturningAdvice (Object retVal) System.out.println("Returning:" + retVal.toString() ); } public void AfterThrowingAdvice (IllegalArgumentException ex) System.out.println("There has been an exception: " + ex.toString()); } }
MainApp.java:
1
2
3
4
5
6
7
8
9
10
11
12
13
14
package com.mi1k7ea;import org.springframework.context.ApplicationContext;import org.springframework.context.support.ClassPathXmlApplicationContext;public class MainApp public static void main (String[] args) ApplicationContext context = new ClassPathXmlApplicationContext("Beans.xml" ); Student student = (Student) context.getBean("student" ); student.getName(); student.getAge(); student.printThrowException(); } }
Beans.xml,注意这里aop:pointcut配置了切入点,通知需要增强哪些方法,:
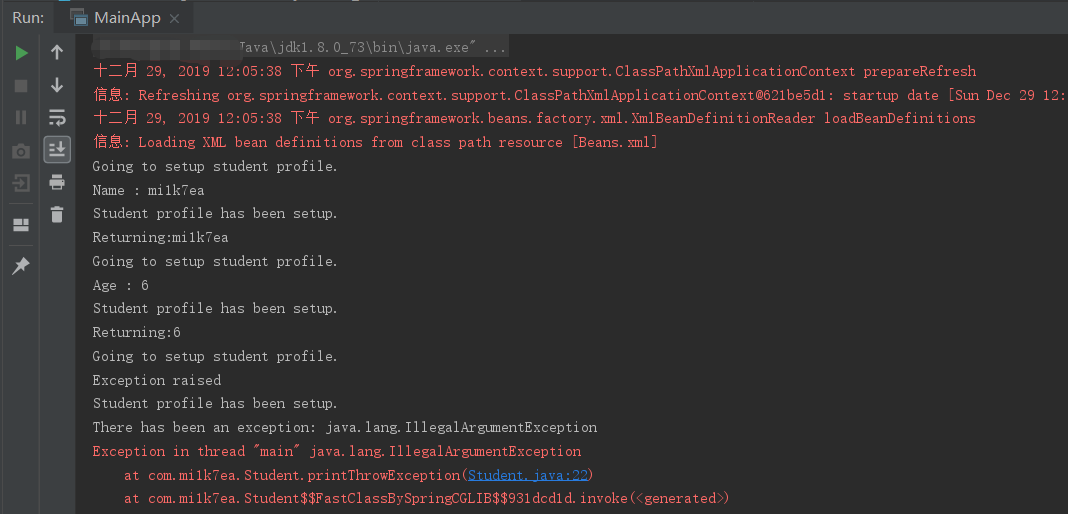
1
2
3
4
5
6
7
8
9
10
11
12
13
14
15
16
17
18
19
20
21
22
23
24
25
26
27
28
29
<?xml version="1.0" encoding="UTF-8"?> <beans xmlns ="http://www.springframework.org/schema/beans" xmlns:xsi ="http://www.w3.org/2001/XMLSchema-instance" xmlns:aop ="http://www.springframework.org/schema/aop" xsi:schemaLocation ="http://www.springframework.org/schema/beans http://www.springframework.org/schema/beans/spring-beans-3.0.xsd http://www.springframework.org/schema/aop http://www.springframework.org/schema/aop/spring-aop-3.0.xsd " > <aop:config > <aop:aspect id ="log" ref ="logging" > <aop:pointcut id ="selectAll" expression ="execution(* com.mi1k7ea.*.*(..))" /> <aop:before pointcut-ref ="selectAll" method ="beforeAdvice" /> <aop:after pointcut-ref ="selectAll" method ="afterAdvice" /> <aop:after-returning pointcut-ref ="selectAll" returning ="retVal" method ="afterReturningAdvice" /> <aop:after-throwing pointcut-ref ="selectAll" throwing ="ex" method ="AfterThrowingAdvice" /> </aop:aspect > </aop:config > <bean id ="student" class ="com.mi1k7ea.Student" > <property name ="name" value ="mi1k7ea" /> <property name ="age" value ="6" /> </bean > <bean id ="logging" class ="com.mi1k7ea.Logging" /> </beans >
运行输出如下:
如果只是想声明某个特定的方法为切入点,则可修改*为具体的类方法,如:
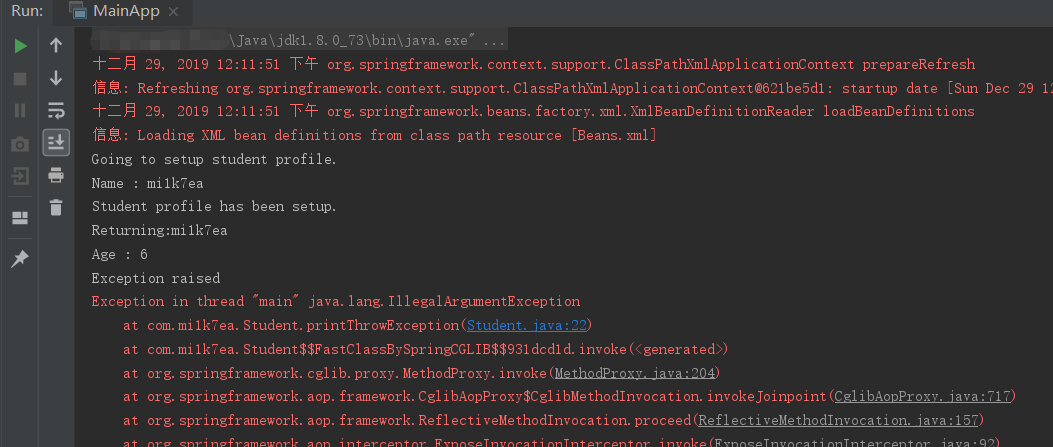
1
2
3
4
5
6
7
8
9
10
11
12
13
14
15
16
17
18
19
20
21
22
23
24
25
26
27
28
29
<?xml version="1.0" encoding="UTF-8"?> <beans xmlns ="http://www.springframework.org/schema/beans" xmlns:xsi ="http://www.w3.org/2001/XMLSchema-instance" xmlns:aop ="http://www.springframework.org/schema/aop" xsi:schemaLocation ="http://www.springframework.org/schema/beans http://www.springframework.org/schema/beans/spring-beans-3.0.xsd http://www.springframework.org/schema/aop http://www.springframework.org/schema/aop/spring-aop-3.0.xsd " > <aop:config > <aop:aspect id ="log" ref ="logging" > <aop:pointcut id ="selectAll" expression ="execution(* com.mi1k7ea.Student.getName(..))" /> <aop:before pointcut-ref ="selectAll" method ="beforeAdvice" /> <aop:after pointcut-ref ="selectAll" method ="afterAdvice" /> <aop:after-returning pointcut-ref ="selectAll" returning ="retVal" method ="afterReturningAdvice" /> <aop:after-throwing pointcut-ref ="selectAll" throwing ="ex" method ="AfterThrowingAdvice" /> </aop:aspect > </aop:config > <bean id ="student" class ="com.mi1k7ea.Student" > <property name ="name" value ="mi1k7ea" /> <property name ="age" value ="6" /> </bean > <bean id ="logging" class ="com.mi1k7ea.Logging" /> </beans >
运行输出,此时只针对特定的类方法实现AOP增强:
基于Annotation的声明式 在Spring中,尽管使用XML配置文件可以实现AOP开发,但是如果所有的相关的配置都集中在配置文件中,势必会导致XML配置文件过于臃肿,从而给维护和升级带来一定的困难。
为此,AspectJ框架为AOP开发提供了另一种开发方式——基于Annotation的声明式。AspectJ允许使用注解定义切面、切入点和增强处理,而Spring框架则可以识别并根据这些注解生成AOP代理。
Annotation注解的介绍如下:
名称
说明
@Aspect
用于定义一个切面。
@Before
用于定义前置通知,相当于 BeforeAdvice。
@AfterReturning
用于定义后置通知,相当于 AfterReturningAdvice。
@Around
用于定义环绕通知,相当于MethodInterceptor。
@AfterThrowing
用于定义抛出通知,相当于ThrowAdvice。
@After
用于定义最终final通知,不管是否异常,该通知都会执行。
@DeclareParents
用于定义引介通知,相当于IntroductionInterceptor(不要求掌握)。
通过在基于架构的XML配置文件中包含以下元素来支持@AspectJ的使用:
1 <aop:aspectj-autoproxy />
此外,还需要在CLASSPATH中使用以下AspectJ库文件:aspectjrt.jar、aspectjweaver.jar、aspectj.jar、aopalliance.jar。
声明aspect Aspects类和其他任何正常的bean一样,除了它们将会用@AspectJ注释之外,它和其他类一样可能有方法和字段,如下所示:
1
2
3
4
5
package org.xyz;import org.aspectj.lang.annotation.Aspect;@Aspect public class AspectModule }
它们将在XML中按照如下进行配置,就和其他任何bean一样:
1 2 3 <bean id ="myAspect" class ="org.xyz.AspectModule" > </bean >
声明切入点 一个切入点 有助于确定使用不同建议执行的感兴趣的连接点(即方法)。在处理基于配置的XML架构时,切入点的声明有两个部分:
一个切入点表达式决定了我们感兴趣的哪个方法会真正被执行;
一个切入点标签包含一个名称和任意数量的参数。方法的真正内容是不相干的,并且实际上它应该是空的;
下面的示例中定义了一个名为‘businessService’的切入点,该切入点将与com.xyz.myapp.service包下的类中可用的每一个方法相匹配:
1
2
3
import org.aspectj.lang.annotation.Pointcut;@Pointcut ("execution(* com.xyz.myapp.service.*.*(..))" ) private void businessService ()
下面的示例中定义了一个名为‘getname’的切入点,该切入点将与com.mi1k7ea包下的Student类中的getName()方法相匹配:
1
2
3
import org.aspectj.lang.annotation.Pointcut;@Pointcut ("execution(* com.mi1k7ea.Student.getName(..))" ) private void getname ()
声明建议 你可以使用@{ADVICE-NAME}注释声明五个建议中的任意一个,如下所示。这假设你已经定义了一个切入点标签方法businessService():
1
2
3
4
5
6
7
8
9
10
11
12
13
14
15
16
17
18
19
20
21
22
@Before ("businessService()" )public void doBeforeTask () ... } @After ("businessService()" )public void doAfterTask () ... } @AfterReturning (pointcut = "businessService()" , returning="retVal" )public void doAfterReturnningTask (Object retVal) ... } @AfterThrowing (pointcut = "businessService()" , throwing="ex" )public void doAfterThrowingTask (Exception ex) ... } @Around ("businessService()" )public void doAroundTask () ... }
你可以为任意一个建议定义你的切入点内联。下面是在建议之前定义内联切入点的一个示例:
1
2
3
4
@Before ("execution(* com.xyz.myapp.service.*.*(..))" )public doBeforeTask () ... }
Demo 在前面例子的基础上,MainApp.java和Student.java不变。
Logging.java:
1
2
3
4
5
6
7
8
9
10
11
12
13
14
15
16
17
18
19
20
21
22
23
24
25
26
27
28
29
30
31
32
33
34
35
36
37
38
39
40
41
42
43
44
45
package com.mi1k7ea;import org.aspectj.lang.annotation.*;@Aspect public class Logging @Pointcut ("execution(* com.mi1k7ea.*.*(..))" ) private void selectAll () @Before ("selectAll()" ) public void beforeAdvice () System.out.println("Going to setup student profile." ); } @After ("selectAll()" ) public void afterAdvice () System.out.println("Student profile has been setup." ); } @AfterReturning (pointcut = "selectAll()" , returning="retVal" ) public void afterReturningAdvice (Object retVal) System.out.println("Returning:" + retVal.toString() ); } @AfterThrowing (pointcut = "selectAll()" , throwing = "ex" ) public void AfterThrowingAdvice (IllegalArgumentException ex) System.out.println("There has been an exception: " + ex.toString()); } }
Beans.xml:
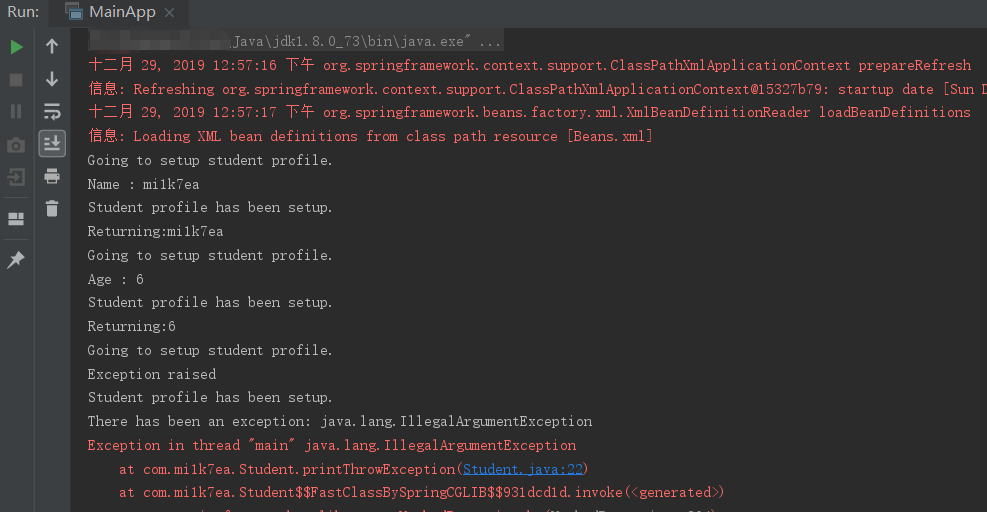
1
2
3
4
5
6
7
8
9
10
11
12
13
14
15
16
17
18
19
20
21
<?xml version="1.0" encoding="UTF-8"?> <beans xmlns ="http://www.springframework.org/schema/beans" xmlns:xsi ="http://www.w3.org/2001/XMLSchema-instance" xmlns:aop ="http://www.springframework.org/schema/aop" xsi:schemaLocation ="http://www.springframework.org/schema/beans http://www.springframework.org/schema/beans/spring-beans-3.0.xsd http://www.springframework.org/schema/aop http://www.springframework.org/schema/aop/spring-aop-3.0.xsd " > <aop:aspectj-autoproxy /> <bean id ="student" class ="com.mi1k7ea.Student" > <property name ="name" value ="mi1k7ea" /> <property name ="age" value ="6" /> </bean > <bean id ="logging" class ="com.mi1k7ea.Logging" /> </beans >
输出如下: