0x00 参考 本笔记直接参考或引自如下链接文章:
https://www.w3cschool.cn/wkspring/
http://c.biancheng.net/spring/
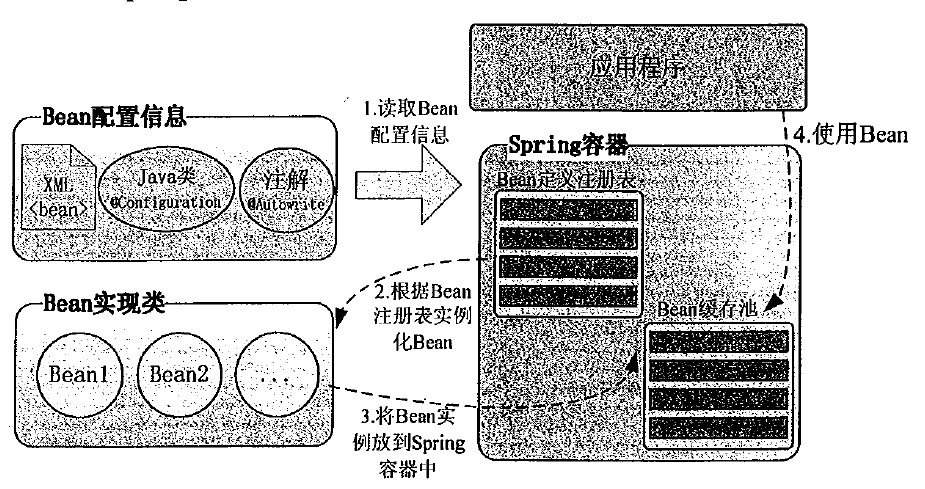
0x01 Bean定义 被称作Bean的对象是构成应用程序的支柱,也是由Spring IoC容器管理的。Bean是一个被实例化、组装、并通过Spring IoC容器所管理的对象。这些Bean是由用容器提供的配置元数据创建的,例如前面看到的在XML的表单中的定义。
Spring配置文件支持两种不同的格式,分别是XML文件格式和Properties文件格式。
通常情况下,Spring会以XML文件格式作为Spring的配置文件,这种配置方式通过XML文件注册并管理Bean之间的依赖关系。XML格式配置文件的根元素是<beans>,该元素包含了多个<bean>子元素,每一个<bean>子元素定义了一个Bean,并描述了该Bean如何被装配到Spring容器中。
定义Bean的示例:
1
2
3
4
5
6
7
8
9
10
11
12
13
<?xml version="1.0" encoding="UTF-8"?> <beans xmlns ="http://www.springframework.org/schema/beans" xmlns:xsi ="http://www.w3.org/2001/XMLSchema-instance" xmlns:p ="http://www.springframework.org/schema/p" xsi:schemaLocation ="http://www.springframework.org/schema/beans http://www.springframework.org/schema/beans/spring-beans-3.2.xsd" > <bean id ="person1" class ="com.mengma.damain.Person1" /> <bean name ="Person2" class ="com.mengma.domain.Person2" /> </beans >
<bean>元素的常用属性:
属性名称
描述
id
是一个 Bean 的唯一标识符,Spring 容器对 Bean 的配置和管理都通过该属性完成
name
Spring 容器同样可以通过此属性对容器中的 Bean 进行配置和管理,name 属性中可以为 Bean 指定多个名称,每个名称之间用逗号或分号隔开
class
该属性指定了 Bean 的具体实现类,它必须是一个完整的类名,使用类的全限定名
scope
用于设定 Bean 实例的作用域,其属性值有 singleton(单例)、prototype(原型)、request、session 和 global Session。其默认值是 singleton
constructor-arg
<bean>元素的子元素,可以使用此元素传入构造参数进行实例化。该元素的 index 属性指定构造参数的序号(从 0 开始),type 属性指定构造参数的类型
property
<bean>元素的子元素,用于调用 Bean 实例中的 Set 方法完成属性赋值,从而完成依赖注入。该元素的 name 属性指定 Bean 实例中的相应属性名
ref
<property>和<constructor-arg>等元素的子元索,该元素中的 bean 属性用于指定对 Bean 工厂中某个 Bean 实例的引用
value
<property>和<constractor-arg>等元素的子元素,用于直接指定一个常量值
list
用于封装 List 或数组类型的依赖注入
set
用于封装 Set 类型属性的依赖注入
map
用于封装 Map 类型属性的依赖注入
entry
<map>元素的子元素,用于设置一个键值对。其 key 属性指定字符串类型的键值,ref 或 value 子元素指定其值
下图表达了Bean与Spring容器之间的关系:
0x02 Bean实例化 在面向对象的程序中,要想调用某个类的成员方法,就需要先实例化该类的对象。在Spring中,实例化Bean有三种方式,分别是构造器实例化、静态工厂方式实例化和实例工厂方式实例化。
构造器实例化 构造器实例化是指Spring容器通过Bean对应的类中默认的构造函数实例化Bean。
Demo Person.java,Bean类,拥有一个构造函数:
1
2
3
4
5
6
7
package com.mi1k7ea;public class Person public Person () System.out.println("Person构造函数" ); } }
MainApp.java:
1
2
3
4
5
6
7
8
9
10
11
12
13
14
15
package com.mi1k7ea;import org.springframework.context.ApplicationContext;import org.springframework.context.support.ClassPathXmlApplicationContext;public class MainApp public static void main (String[] args) String xmlPath = "Beans.xml" ; ApplicationContext applicationContext = new ClassPathXmlApplicationContext(xmlPath); System.out.println(applicationContext.getBean("person" )); } }
Beans.xml,定义了一个id为person的Bean,其class属性指定了对应的类为Person:
1
2
3
4
5
6
7
8
9
<?xml version="1.0" encoding="UTF-8"?> <beans xmlns ="http://www.springframework.org/schema/beans" xmlns:xsi ="http://www.w3.org/2001/XMLSchema-instance" xsi:schemaLocation ="http://www.springframework.org/schema/beans http://www.springframework.org/schema/beans/spring-beans-3.0.xsd" > <bean id ="person" class ="com.mi1k7ea.Person" /> </beans >
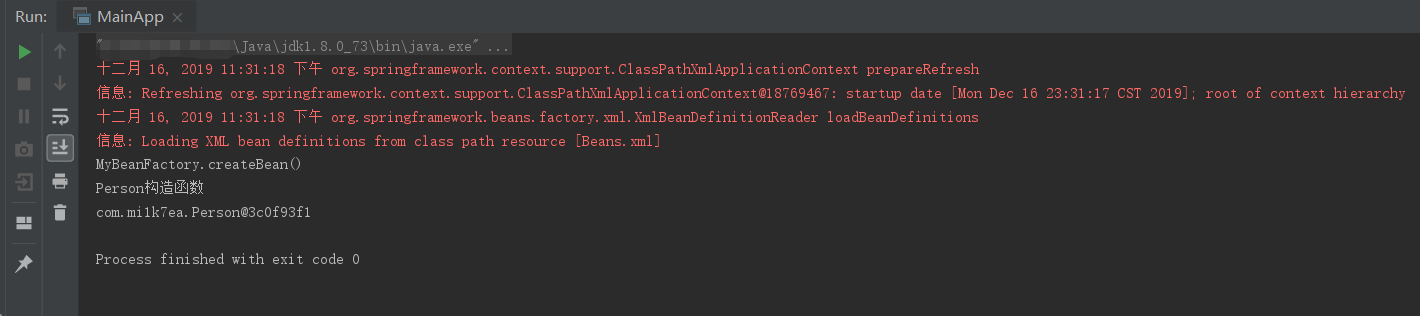
运行输出,看到是通过调用Bean类的构造函数来实例化Bean:
静态工厂方式实例化 在Spring中,可以使用静态工厂的方式实例化Bean。此种方式需要提供一个静态工厂方法创建Bean的实例。
Demo MainApp.java和Person.java不变。
MyBeanFactory.java,创建一个名为createBean()的静态方法,用于创建Bean的实例:
1
2
3
4
5
6
7
8
9
package com.mi1k7ea;public class MyBeanFactory public static Person createBean () System.out.println("MyBeanFactory.createBean()" ); return new Person(); } }
Beans.xml,定义了一个id为person的Bean,其class属性指定了对应的工厂实现类为MyBeanFactory,而factory-method属性用于告诉Spring容器调用工厂类中的createBean()方法获取Bean的实例:
1
2
3
4
5
6
7
8
9
<?xml version="1.0" encoding="UTF-8"?> <beans xmlns ="http://www.springframework.org/schema/beans" xmlns:xsi ="http://www.w3.org/2001/XMLSchema-instance" xsi:schemaLocation ="http://www.springframework.org/schema/beans http://www.springframework.org/schema/beans/spring-beans-3.0.xsd" > <bean id ="person" class ="com.mi1k7ea.MyBeanFactory" factory-method ="createBean" /> </beans >
运行输出,看到是通过调用静态工厂的方式即调用MyBeanFactory的静态方法createBean()来实例化Bean:
实例工厂方式实例化 在这种方式中,工厂类不再使用静态方法创建Bean的实例,而是直接在成员方法中创建Bean的实例。同时,在配置文件中,需要实例化的Bean也不是通过class属性直接指向其实例化的类,而是通过factory-bean属性配置一个实例工厂,然后使用factory-method属性确定使用工厂中的哪个方法。
Demo Person.java和MainApp.java不变。
MyBeanFactory.java:
1
2
3
4
5
6
7
8
9
10
11
12
13
package com.mi1k7ea;public class MyBeanFactory public MyBeanFactory () System.out.println("MyBeanFactory构造函数" ); } public Person createBean () System.out.println("MyBeanFactory.createBean()" ); return new Person(); } }
Beans.xml,首先配置了一个实例工厂Bean,然后配置了需要实例化的Bean,在id为person的Bean中,使用factory-bean属性指定一个实例工厂,该属性值就是实例工厂的id属性值,使用factory-method属性确定使用工厂中的createBean()方法:
1
2
3
4
5
6
7
8
9
10
11
12
13
<?xml version="1.0" encoding="UTF-8"?> <beans xmlns ="http://www.springframework.org/schema/beans" xmlns:xsi ="http://www.w3.org/2001/XMLSchema-instance" xsi:schemaLocation ="http://www.springframework.org/schema/beans http://www.springframework.org/schema/beans/spring-beans-3.0.xsd" > <bean id ="myBeanFactory" class ="com.mi1k7ea.MyBeanFactory" /> <bean id ="person" factory-bean ="myBeanFactory" factory-method ="createBean" /> </beans >
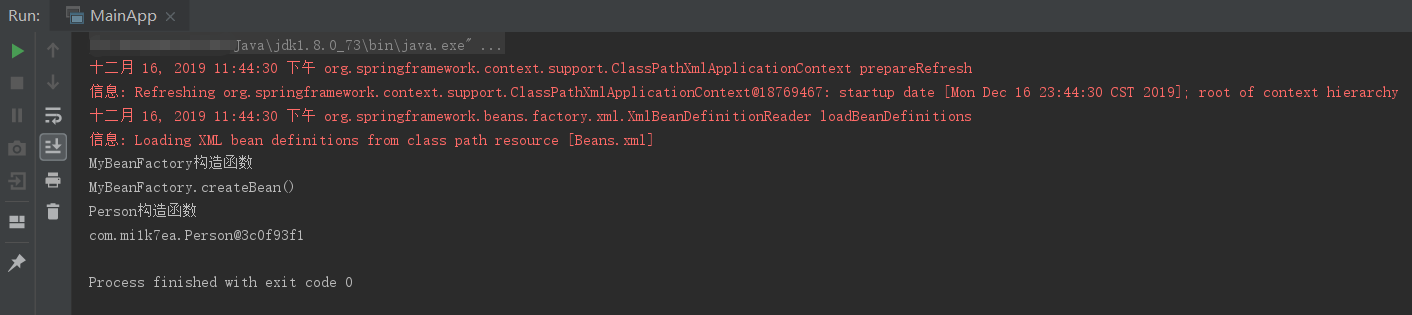
运行输出,看到先实例化工厂类并调用createBean()方法成功实例化Bean:
0x03 Bean作用域 当在Spring中定义一个Bean时,你必须声明该Bean的作用域的选项。例如,为了强制Spring在每次需要时都产生一个新的Bean实例,你应该声明Bean的作用域的属性为prototype 。同理,如果你想让Spring在每次需要时都返回同一个Bean实例,你应该声明Bean的作用域的属性为singleton 。
Spring 框架支持以下五个作用域:
作用域
描述
singleton
在Spring IoC容器仅存在一个Bean实例,Bean以单例方式存在,默认值
prototype
每次从容器中调用Bean时,都返回一个新的实例,即每次调用getBean()时,相当于执行newXxxBean()
request
每次HTTP请求都会创建一个新的Bean,该作用域仅适用于WebApplicationContext环境
session
同一个HTTP Session共享一个Bean,不同Session使用不同的Bean,仅适用于WebApplicationContext环境
global-session
一般用于Portlet应用环境,该运用域仅适用于WebApplicationContext环境
singleton singleton是默认的作用域。当一个Bean的作用域为singleton时,Spring容器中只会存在一个共享的Bean实例,并且所有对Bean的请求,只要id与该Bean定义相匹配,就只会返回Bean的同一个实例。
singleton是单例类型,就是在创建起容器时就同时自动创建了一个Bean的对象,不管你是否使用,它都存在了,每次获取到的对象都是同一个对象。
通常情况下,这种单例模式对于无会话状态的Bean(如DAO层、Service层)来说,是最理想的选择。
XML中显式设置示例:
1 2 3 4 <bean id ="..." class ="..." scope ="singleton" > </bean >
Demo 沿用前面的例子,HelloWorld.java不变。
MainApp.java,调用两次getBean()并调用Bean的getMessage()方法查看是否是同一个对象:
1
2
3
4
5
6
7
8
9
10
11
12
13
14
15
package com.mi1k7ea;import org.springframework.context.ApplicationContext;import org.springframework.context.support.ClassPathXmlApplicationContext;public class MainApp public static void main (String[] args) ApplicationContext context = new ClassPathXmlApplicationContext("Beans.xml" ); HelloWorld objA = (HelloWorld) context.getBean("helloWorld" ); objA.setMessage("Object A" ); objA.getMessage(); HelloWorld objB = (HelloWorld) context.getBean("helloWorld" ); objB.getMessage(); } }
Beans.xml,显式设置scope,并去掉其中的设置Bean类属性值的property标签:
1
2
3
4
5
6
7
8
9
<?xml version="1.0" encoding="UTF-8"?> <beans xmlns ="http://www.springframework.org/schema/beans" xmlns:xsi ="http://www.w3.org/2001/XMLSchema-instance" xsi:schemaLocation ="http://www.springframework.org/schema/beans http://www.springframework.org/schema/beans/spring-beans-3.0.xsd" > <bean id ="helloWorld" class ="com.mi1k7ea.HelloWorld" scope ="singleton" /> </beans >
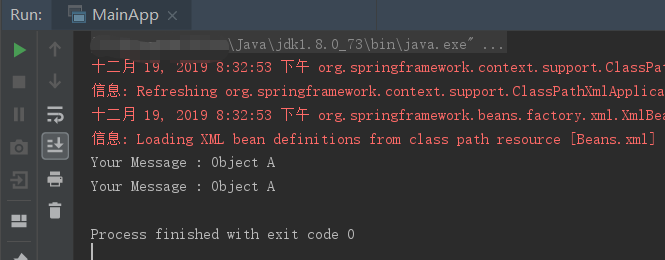
输出都是一样的,说明singleton作用域即默认的作用域就是单例模式,在创建容器时就自动创建了该Bean对象,而每次getBean()获取到的都是同一个Bean对象:
prototype 当一个Bean的作用域为prototype,表示一个Bean定义对应多个对象实例。prototype作用域的Bean会导致在每次对该Bean请求(将其注入到另一个Bean中,或者以程序的方式调用容器的getBean()方法)时都会创建一个新的Bean实例。
prototype是原型类型,它在我们创建容器的时候并没有实例化,而是当我们获取Bean的时候才会去创建一个对象,而且我们每次获取到的对象都不是同一个对象。
根据经验,对有状态的Bean应该使用prototype作用域,而对无状态的Bean则应该使用singleton作用域。
XML中设置示例:
1 2 3 4 <bean id ="..." class ="..." scope ="prototype" > </bean >
Demo HelloWorld.java和MainApp.java不变。
Beans.xml,设置scope,并在property标签中设置创建Bean类时message属性的默认值为”Default Object”:
1
2
3
4
5
6
7
8
9
10
11
<?xml version="1.0" encoding="UTF-8"?> <beans xmlns ="http://www.springframework.org/schema/beans" xmlns:xsi ="http://www.w3.org/2001/XMLSchema-instance" xsi:schemaLocation ="http://www.springframework.org/schema/beans http://www.springframework.org/schema/beans/spring-beans-3.0.xsd" > <bean id ="helloWorld" class ="com.mi1k7ea.HelloWorld" scope ="prototype" > <property name ="message" value ="Default Object" /> </bean > </beans >
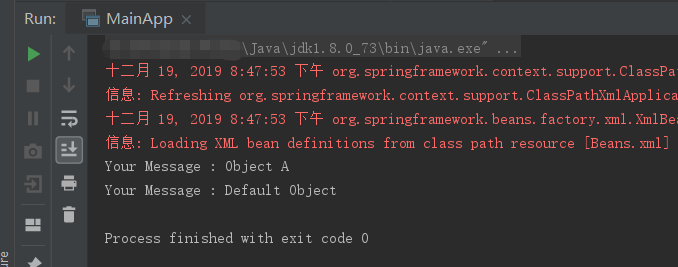
输出不一样,说明两次getBean()获取的Bean类对象并不是同一个,同时说明prototype作用域是在获取Bean时会新建一个Bean对象:
0x04 Bean生命周期 Bean的生命周期可以表达为:Bean的定义->Bean的初始化->Bean的使用->Bean的销毁
Spring容器可以管理singleton作用域Bean的生命周期,在此作用域下,Spring能够精确地知道该Bean何时被创建,何时初始化完成,以及何时被销毁。而对于prototype作用域的Bean,Spring只负责创建,当容器创建了Bean的实例后,Bean的实例就交给客户端代码管理,Spring容器将不再跟踪其生命周期。每次客户端请求prototype作用域的Bean时,Spring容器都会创建一个新的实例,并且不会管那些被配置成prototype作用域的Bean的生命周期。
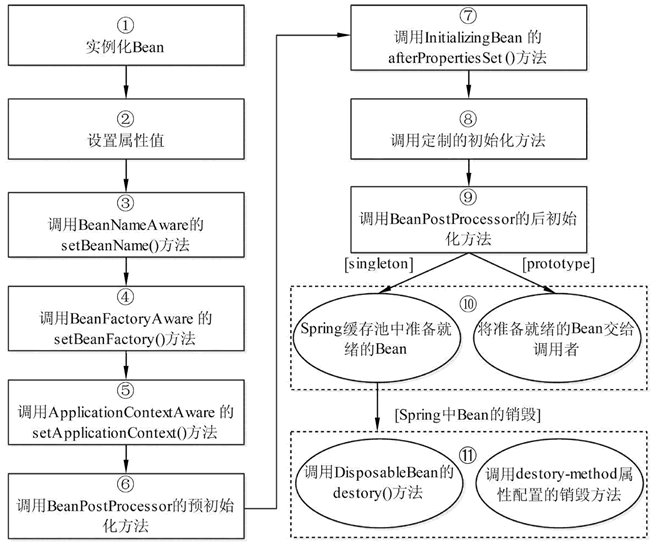
当一个Bean被加载到Spring容器时,它就具有了生命,而Spring容器在保证一个Bean能够使用之前,会进行很多工作。Spring容器中Bean的生命周期流程如图:
Bean生命周期的整个执行过程描述如下:
根据配置情况调用Bean构造方法或工厂方法实例化Bean。
利用依赖注入完成Bean中所有属性值的配置注入。
如果Bean实现了BeanNameAware接口,则Spring调用Bean的setBeanName()方法传入当前Bean的id值。
如果Bean实现了BeanFactoryAware接口,则Spring调用setBeanFactory()方法传入当前工厂实例的引用。
如果Bean实现了ApplicationContextAware接口,则Spring调用setApplicationContext()方法传入当前ApplicationContext实例的引用。
如果BeanPostProcessor和Bean关联,则Spring将调用该接口的预初始化方法postProcessBeforeInitialzation()对Bean进行加工操作,此处非常重要,Spring的AOP就是利用它实现的。
如果Bean实现了InitializingBean接口,则Spring将调用afterPropertiesSet()方法。
如果在配置文件中通过init-method属性指定了初始化方法,则调用该初始化方法。
如果BeanPostProcessor和Bean关联,则Spring将调用该接口的初始化方法postProcessAfterInitialization()。此时,Bean已经可以被应用系统使用了。
如果在<bean>中指定了该 Bean 的作用范围为scope=”singleton”,则将该Bean放入Spring IoC的缓存池中,将触发Spring对该Bean的生命周期管理;如果在<bean>中指定了该Bean的作用范围为scope=”prototype”,则将该Bean交给调用者,调用者管理该Bean的生命周期,Spring不再管理该Bean。
如果Bean实现了DisposableBean接口,则Spring会调用destory()方法将Spring中的Bean销毁;如果在配置文件中通过destory-method属性指定了Bean的销毁方法,则Spring将调用该方法对Bean进行销毁。
这里我们只讨论两个重要的生命周期回调方法,它们在Bean的初始化和销毁的时候是必需的。
为了定义安装和拆卸一个Bean,我们只要声明带有init-method 或destroy-method 参数的 。init-method属性指定一个方法,在实例化Bean 时,立即调用该方法。同样,destroy-method指定一个方法,只有从容器中移除Bean之后,才能调用该方法。
初始化回调 org.springframework.beans.factory.InitializingBean接口指定一个单一的方法:
1 void afterPropertiesSet () throws Exception
因此,你可以简单地实现上述接口和初始化工作可以在afterPropertiesSet()方法中执行,如下所示:
1
2
3
4
5
public class ExampleBean implements InitializingBean public void afterPropertiesSet () } }
在基于XML的配置元数据的情况下,你可以使用 init-method 属性来指定带有void无参数方法的名称。例如:
1 <bean id ="exampleBean" class ="examples.ExampleBean" init-method ="init" />
下面是类的定义:
1
2
3
4
5
public class ExampleBean public void init () } }
销毁回调 org.springframework.beans.factory.DisposableBean接口指定一个单一的方法:
1 void destroy () throws Exception
因此,你可以简单地实现上述接口并且结束工作可以在destroy()方法中执行,如下所示:
1
2
3
4
5
public class ExampleBean implements DisposableBean public void destroy () } }
在基于XML的配置元数据的情况下,你可以使用 destroy-method 属性来指定带有void无参数方法的名称。例如:
1 <bean id ="exampleBean" class ="examples.ExampleBean" destroy-method ="destroy" />
下面是类的定义:
1
2
3
4
5
public class ExampleBean public void destroy () } }
如果你在非Web应用程序环境中使用Spring IoC容器,例如在丰富的客户端桌面环境中,那么在JVM中你要注册关闭hook。这样做可以确保正常关闭,为了让所有的资源都被释放,可以在单个Beans上调用destroy方法。
默认的初始化和销毁方法 如果你有太多具有相同名称的初始化或者销毁方法的Bean,那么你不需要在每一个Bean上声明初始化方法 和销毁方法 。框架使用元素中的 default-init-method 和 default-destroy-method 属性提供了灵活地配置这种情况,如下所示:
1 2 3 4 5 6 7 8 9 10 11 12 <beans xmlns ="http://www.springframework.org/schema/beans" xmlns:xsi ="http://www.w3.org/2001/XMLSchema-instance" xsi:schemaLocation ="http://www.springframework.org/schema/beans http://www.springframework.org/schema/beans/spring-beans-3.0.xsd" default-init-method ="init" default-destroy-method ="destroy" > <bean id ="..." class ="..." > </bean > </beans >
Demo 修改HelloWorld.java,添加init()和destroy()方法:
1
2
3
4
5
6
7
8
9
10
11
12
13
14
15
16
17
18
19
20
21
package com.mi1k7ea;public class HelloWorld private String message; public void setMessage (String message) this .message = message; } public void getMessage () System.out.println("Your Message : " + message); } public void init () System.out.println("Bean is going through init." ); } public void destroy () System.out.println("Bean will destroy now." ); } }
修改MainApp.java,需要注册一个在AbstractApplicationContext类中声明的关闭hook的registerShutdownHook()方法。它将确保正常关闭,并且调用相关的destroy()方法:
1
2
3
4
5
6
7
8
9
10
11
12
13
package com.mi1k7ea;import org.springframework.context.support.AbstractApplicationContext;import org.springframework.context.support.ClassPathXmlApplicationContext;public class MainApp public static void main (String[] args) AbstractApplicationContext context = new ClassPathXmlApplicationContext("Beans.xml" ); HelloWorld obj = (HelloWorld) context.getBean("helloWorld" ); obj.getMessage(); context.registerShutdownHook(); } }
Beans.xml,通过init-method和destroy-method来设置初始化和销毁的回调方法:
1
2
3
4
5
6
7
8
9
10
11
<?xml version="1.0" encoding="UTF-8"?> <beans xmlns ="http://www.springframework.org/schema/beans" xmlns:xsi ="http://www.w3.org/2001/XMLSchema-instance" xsi:schemaLocation ="http://www.springframework.org/schema/beans http://www.springframework.org/schema/beans/spring-beans-3.0.xsd" > <bean id ="helloWorld" class ="com.mi1k7ea.HelloWorld" init-method ="init" destroy-method ="destroy" > <property name ="message" value ="mi1k7ea" /> </bean > </beans >
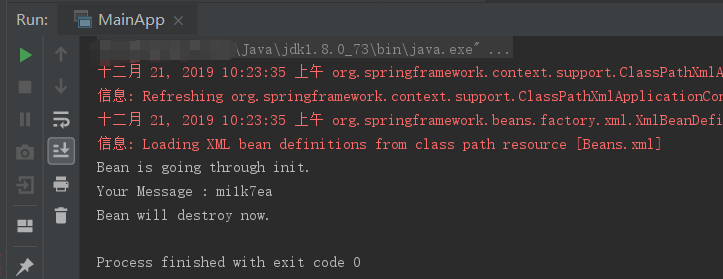
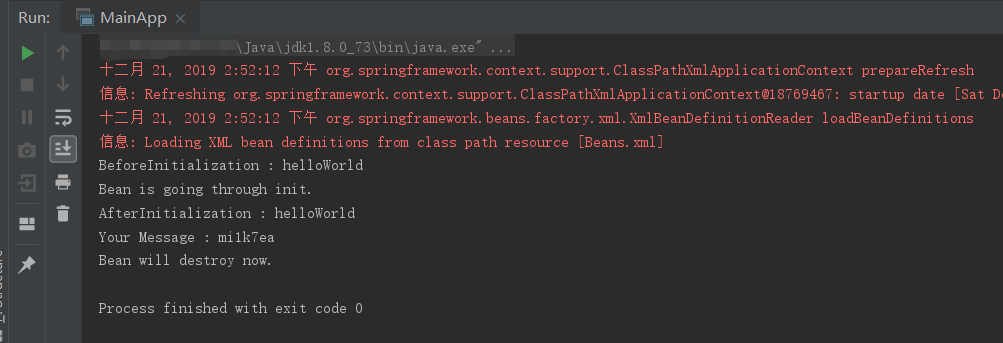
运行输出,看到在在初始化之前调用了初始化回调方法以及在销毁Bean对象之前调用了销毁回调方法:
Spring中的事件处理 ApplicationContext负责管理Beans的完整生命周期。当加载Beans时,ApplicationContext发布某些类型的事件。例如,当上下文启动时,ContextStartedEvent发布,当上下文停止时,ContextStoppedEvent发布。
通过ApplicationEvent类和ApplicationListener接口来提供在ApplicationContext中处理事件。如果一个Bean实现ApplicationListener,那么每次ApplicationEvent被发布到ApplicationContext上,那个Bean会被通知。
Spring提供了以下的标准事件:
Spring 内置事件
描述
ContextRefreshedEvent
ApplicationContext被初始化或刷新时,该事件被发布。这也可以在ConfigurableApplicationContext接口中使用refresh()方法来发生。
ContextStartedEvent
当使用ConfigurableApplicationContext接口中的start()方法启动ApplicationContext时,该事件被发布。你可以调查你的数据库,或者你可以在接受到这个事件后重启任何停止的应用程序。
ContextStoppedEvent
当使用ConfigurableApplicationContext接口中的stop()方法停止ApplicationContext时,发布这个事件。你可以在接受到这个事件后做必要的清理的工作。
ContextClosedEvent
当使用ConfigurableApplicationContext接口中的close()方法关闭ApplicationContext时,该事件被发布。一个已关闭的上下文到达生命周期末端;它不能被刷新或重启。
RequestHandledEvent
这是一个web-specific事件,告诉所有Bean HTTP请求已经被服务。
监听上下文事件 为了监听上下文事件,一个Bean应该实现只有一个方法onApplicationEvent() 的ApplicationListener接口。
下面看下例子。
HelloWorld.java:
1
2
3
4
5
6
7
8
9
10
11
12
13
package com.mi1k7ea;public class HelloWorld private String message; public void setMessage (String message) this .message = message; } public void getMessage () System.out.println("Your Message : " + message); } }
CStartEventHandler.java,实现ApplicationListener类的ContextStartedEvent事件:
1
2
3
4
5
6
7
8
9
10
package com.mi1k7ea;import org.springframework.context.ApplicationListener;import org.springframework.context.event.ContextStartedEvent;public class CStartEventHandler implements ApplicationListener <ContextStartedEvent > public void onApplicationEvent (ContextStartedEvent event) System.out.println("ContextStartedEvent Received" ); } }
CStopEventHandler.java,实现ApplicationListener类的ContextStoppedEvent事件:
1
2
3
4
5
6
7
8
9
10
package com.mi1k7ea;import org.springframework.context.ApplicationListener;import org.springframework.context.event.ContextStoppedEvent;public class CStopEventHandler implements ApplicationListener <ContextStoppedEvent > public void onApplicationEvent (ContextStoppedEvent event) System.out.println("ContextStoppedEvent Received" ); } }
MainApp.java:
1
2
3
4
5
6
7
8
9
10
11
12
13
14
15
16
17
18
19
20
package com.mi1k7ea; import org.springframework.context.ConfigurableApplicationContext;import org.springframework.context.support.ClassPathXmlApplicationContext;public class MainApp public static void main(String [] args) { ConfigurableApplicationContext context = new ClassPathXmlApplicationContext("Beans.xml" ); context.start(); HelloWorld obj = (HelloWorld) context.getBean("helloWorld" ); obj.getMessage(); context.stop(); } }
Beans.xml,添加两个实现监听上下文事件的Bean类:
1
2
3
4
5
6
7
8
9
10
11
12
13
14
15
<?xml version="1.0" encoding="UTF-8"?> <beans xmlns="http://www.springframework.org/schema/beans" xmlns:xsi="http://www.w3.org/2001/XMLSchema-instance" xsi:schemaLocation="http://www.springframework.org/schema/beans http://www.springframework.org/schema/beans/spring-beans-3.0.xsd"> <bean id="helloWorld" class="com.mi1k7ea.HelloWorld"> <property name="message" value="mi1k7ea"/> </bean> <bean id="cStartEventHandler" class="com.mi1k7ea.CStartEventHandler"/> <bean id="cStopEventHandler" class="com.mi1k7ea.CStopEventHandler"/> </beans>
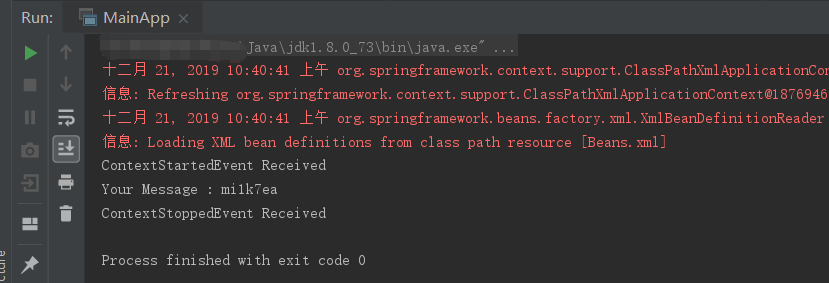
运行输出:
Spring中的自定义事件 Spring支持编写和发布用户的自定义事件,具体步骤如下示例。
CustomEvent.java,通过扩展ApplicationEvent类来创建的事件类,这个类必须定义一个默认的构造函数,它应该是从ApplicationEvent类中继承的构造函数:
1
2
3
4
5
6
7
8
9
10
11
12
package com.mi1k7ea;import org.springframework.context.ApplicationEvent;public class CustomEvent extends ApplicationEvent public CustomEvent (Object source) super (source); } public String toString () return "My Custom Event" ; } }
一旦定义事件类,你可以从任何类中发布它。
CustomEventPublisher.java,实现了ApplicationEventPublisherAware接口类,用于发布事件类,此外还需要在XML配置文件中声明这个类作为一个Bean,之所以容器可以识别Bean作为事件发布者,是因为它实现了ApplicationEventPublisherAware接口:
1
2
3
4
5
6
7
8
9
10
11
12
13
14
15
16
package com.mi1k7ea;import org.springframework.context.ApplicationEventPublisher;import org.springframework.context.ApplicationEventPublisherAware;public class CustomEventPublisher implements ApplicationEventPublisherAware private ApplicationEventPublisher publisher; public void setApplicationEventPublisher (ApplicationEventPublisher publisher){ this .publisher = publisher; } public void publish () CustomEvent ce = new CustomEvent(this ); publisher.publishEvent(ce); } }
CustomEventHandler.java,实现了ApplicationListener接口类,发布的事件可以在该类中被处理,而且实现了自定义事件的onApplicationEvent()方法:
1
2
3
4
5
6
7
8
9
package com.mi1k7ea;import org.springframework.context.ApplicationListener;public class CustomEventHandler implements ApplicationListener <CustomEvent > public void onApplicationEvent (CustomEvent event) System.out.println(event.toString()); } }
MainApp.java,获取自定义事件发布者的Bean,并调用发布方法:
1
2
3
4
5
6
7
8
9
10
11
12
package com.mi1k7ea;import org.springframework.context.ConfigurableApplicationContext;import org.springframework.context.support.ClassPathXmlApplicationContext;public class MainApp public static void main (String[] args) ConfigurableApplicationContext context = new ClassPathXmlApplicationContext("Beans.xml" ); CustomEventPublisher cvp = (CustomEventPublisher) context.getBean("customEventPublisher" ); cvp.publish(); } }
Beans.xml,声明事件发布者的Bean和事务处理者的Bean:
1
2
3
4
5
6
7
8
9
10
11
<?xml version="1.0" encoding="UTF-8"?> <beans xmlns ="http://www.springframework.org/schema/beans" xmlns:xsi ="http://www.w3.org/2001/XMLSchema-instance" xsi:schemaLocation ="http://www.springframework.org/schema/beans http://www.springframework.org/schema/beans/spring-beans-3.0.xsd" > <bean id ="customEventHandler" class ="com.mi1k7ea.CustomEventHandler" /> <bean id ="customEventPublisher" class ="com.mi1k7ea.CustomEventPublisher" /> </beans >
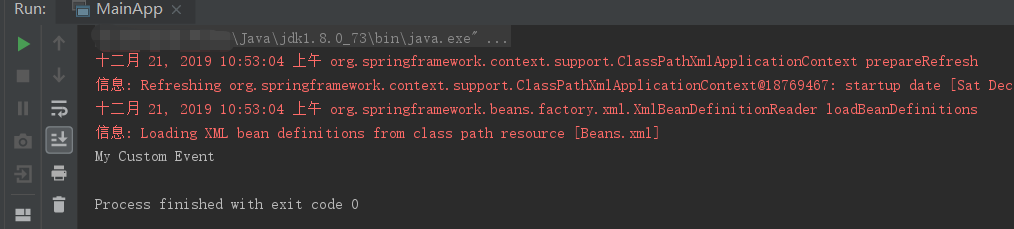
运行输出:
0x05 Bean后置处理器 Bean后置处理器允许在调用初始化方法前后对Bean进行额外的处理。
BeanPostProcessor 接口定义回调方法,你可以实现该方法来提供自己的实例化逻辑,依赖解析逻辑等。你也可以在Spring容器通过插入一个或多个BeanPostProcessor的实现来完成实例化,配置和初始化一个Bean之后实现一些自定义逻辑回调方法。
你可以配置多个BeanPostProcessor接口,通过设置BeanPostProcessor实现的Ordered 接口提供的order 属性来控制这些BeanPostProcessor接口的执行顺序。
BeanPostProcessor可以对Bean(或对象)实例进行操作,这意味着Spring IoC容器实例化一个Bean实例,然后BeanPostProcessor接口进行它们的工作。
ApplicationContext 会自动检测由BeanPostProcessor 接口的实现定义的Bean,注册这些Bean为后置处理器,然后通过在容器中创建Bean,在适当的时候调用它。
Demo HelloWorld.java,添加初始化和销毁方法:
1
2
3
4
5
6
7
8
9
10
11
12
13
14
15
16
17
18
19
20
21
package com.mi1k7ea;public class HelloWorld private String message; public void setMessage (String message) this .message = message; } public void getMessage () System.out.println("Your Message : " + message); } public void init () System.out.println("Bean is going through init." ); } public void destroy () System.out.println("Bean will destroy now." ); } }
InitHelloWorld.java,实现BeanPostProcessor接口类,在任何Bean的初始化前后输出该Bean的名称:
1
2
3
4
5
6
7
8
9
10
11
12
13
14
15
package com.mi1k7ea;import org.springframework.beans.BeansException;import org.springframework.beans.factory.config.BeanPostProcessor;public class InitHelloWorld implements BeanPostProcessor public Object postProcessBeforeInitialization (Object bean, String beanName) throws BeansException System.out.println("BeforeInitialization : " + beanName); return bean; } public Object postProcessAfterInitialization (Object bean, String beanName) throws BeansException System.out.println("AfterInitialization : " + beanName); return bean; } }
MainApp.java,需要注册一个在AbstractApplicationContext类中声明的关闭hook的registerShutdownHook()方法。它将确保正常关闭,并且调用相关的destroy方法:
1
2
3
4
5
6
7
8
9
10
11
12
13
package com.mi1k7ea;import org.springframework.context.support.AbstractApplicationContext;import org.springframework.context.support.ClassPathXmlApplicationContext;public class MainApp public static void main (String[] args) AbstractApplicationContext context = new ClassPathXmlApplicationContext("Beans.xml" ); HelloWorld obj = (HelloWorld) context.getBean("helloWorld" ); obj.getMessage(); context.registerShutdownHook(); } }
Beans.xml,在前面初始化回调和销毁回调的基础上,添加设置bean标签指定后置处理器为InitHelloWorld,ApplicationContext会自动检测到该实现类定义的Bean为后置处理器、在恰当的时候调用它:
1
2
3
4
5
6
7
8
9
10
11
12
13
<?xml version="1.0" encoding="UTF-8"?> <beans xmlns ="http://www.springframework.org/schema/beans" xmlns:xsi ="http://www.w3.org/2001/XMLSchema-instance" xsi:schemaLocation ="http://www.springframework.org/schema/beans http://www.springframework.org/schema/beans/spring-beans-3.0.xsd" > <bean id ="helloWorld" class ="com.mi1k7ea.HelloWorld" init-method ="init" destroy-method ="destroy" > <property name ="message" value ="mi1k7ea" /> </bean > <bean class ="com.mi1k7ea.InitHelloWorld" /> </beans >
运行输出如下,看到在调用HelloWorld的初始化函数init()的前后都调用了Bean后置处理器对应的函数进行输出:
0x06 Bean定义继承 Bean定义可以包含很多的配置信息,包括构造函数的参数、属性值、容器的具体信息等等。
子Bean的定义继承父定义的配置数据。子定义可以根据需要重写一些值,或者添加其他值。
Spring Bean定义的继承与Java类的继承无关,但是继承的概念是一样的。你可以定义一个父Bean的定义作为模板,其他子Bean就可以从父Bean中继承所需的配置。
当你使用基于XML的配置元数据时,通过使用父属性,指定父Bean作为该属性的值来表明子Bean的定义。
Demo HelloWorld.java,拥有2个message属性及其getter和setter方法:
1
2
3
4
5
6
7
8
9
10
11
12
13
14
15
16
17
18
19
20
21
22
package com.mi1k7ea;public class HelloWorld private String message1; private String message2; public void setMessage1 (String message) this .message1 = message; } public void setMessage2 (String message) this .message2 = message; } public void getMessage1 () System.out.println("Message1 : " + message1); } public void getMessage2 () System.out.println("Message2 : " + message2); } }
Son.java,拥有3个message属性及其getter和setter方法:
1
2
3
4
5
6
7
8
9
10
11
12
13
14
15
16
17
18
19
20
21
22
23
24
25
26
27
28
29
30
31
package com.mi1k7ea;public class Son private String message1; private String message2; private String message3; public void setMessage1 (String message) this .message1 = message; } public void setMessage2 (String message) this .message2 = message; } public void setMessage3 (String message) this .message3 = message; } public void getMessage1 () System.out.println("Son Message1 : " + message1); } public void getMessage2 () System.out.println("Son Message2 : " + message2); } public void getMessage3 () System.out.println("Son Message3 : " + message3); } }
MainApp.java,分别声明了HelloWorld对象和Son对象并分别调用getter方法:
1
2
3
4
5
6
7
8
9
10
11
12
13
14
15
16
17
18
19
20
package com.mi1k7ea;import org.springframework.context.ApplicationContext;import org.springframework.context.support.ClassPathXmlApplicationContext;public class MainApp public static void main (String[] args) ApplicationContext context = new ClassPathXmlApplicationContext("Beans.xml" ); HelloWorld objA = (HelloWorld) context.getBean("helloWorld" ); objA.getMessage1(); objA.getMessage2(); Son objB = (Son) context.getBean("son" ); objB.getMessage1(); objB.getMessage2(); objB.getMessage3(); } }
Beans.xml,注意son是作为helloWorld的子Bean,用parent标记其父Bean,其中重写了message1的属性,继承了message2的属性,添加了message3属性:
1
2
3
4
5
6
7
8
9
10
11
12
13
14
15
16
17
<?xml version="1.0" encoding="UTF-8"?> <beans xmlns ="http://www.springframework.org/schema/beans" xmlns:xsi ="http://www.w3.org/2001/XMLSchema-instance" xsi:schemaLocation ="http://www.springframework.org/schema/beans http://www.springframework.org/schema/beans/spring-beans-3.0.xsd" > <bean id ="helloWorld" class ="com.mi1k7ea.HelloWorld" > <property name ="message1" value ="Father's Message1" /> <property name ="message2" value ="Father's Message2" /> </bean > <bean id ="son" class ="com.mi1k7ea.Son" parent ="helloWorld" > <property name ="message1" value ="Son's Message1" /> <property name ="message3" value ="Son's Message3" /> </bean > </beans >
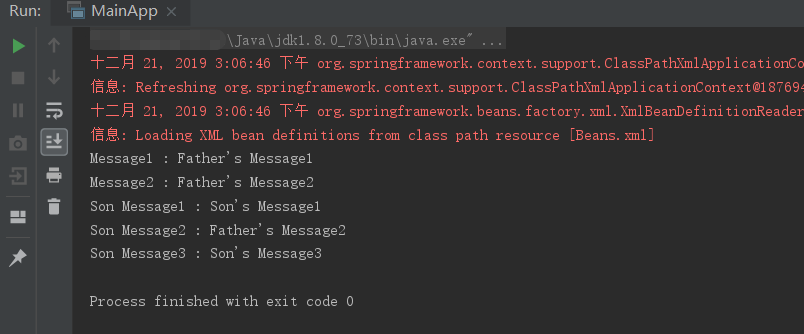
输出:
Bean定义模板 此外,还可以定义一个Bean定义模板,不用指定class的属性,而应该指定带true值的abstract属性:
1
2
3
4
5
6
7
8
9
10
11
12
13
14
15
16
17
18
19
<?xml version="1.0" encoding="UTF-8"?> <beans xmlns ="http://www.springframework.org/schema/beans" xmlns:xsi ="http://www.w3.org/2001/XMLSchema-instance" xsi:schemaLocation ="http://www.springframework.org/schema/beans http://www.springframework.org/schema/beans/spring-beans-3.0.xsd" > <bean id ="beanTeamplate" abstract ="true" > <property name ="message1" value ="A" /> <property name ="message2" value ="B" /> <property name ="message3" value ="C" /> </bean > <bean id ="son" class ="com.mi1k7ea.Son" parent ="beanTeamplate" > <property name ="message1" value ="new A" /> <property name ="message3" value ="new C" /> </bean > </beans >
此时beanTeamplate为父Bean,由于标记为抽象的,因此只作为模板给子Bean使用而不会被实例化。